|
Short on time? This quick & festive cookie has you covered!  Prep & Baking: 20 minutes
Makes: 24 medium sized cookies Main Ingredients: 1 box of chocolate cake mix – most grocery stores have a variety of both conventional, organic, and gluten free to choose from 2 tsp peppermint extract ½ cups chocolate chips, chunks or pieces (optional) 1/3 cup vegetable oil ¼ cup water 1/3 cup or more crushed candy cane Method: Preheat oven to 350°F and line two baking sheets with parchment paper. In a large mixing bowl, combine dry cake mix with oil and water. Stir together until all ingredients are incorporated and there are no lumps. Add in chocolate chips and peppermint extract and mix well. Roll dough into approximately 1 inch balls and dip the tops of the cookie balls into the crushed candy cane; coating the top half of the cookie in candy. Place the dough balls on prepared cookie sheet. These cookies will spread so leave plenty of room between each dough ball. I recommend putting no more than 8 cookies on each sheet. Bake the cookies for 10-12 minutes then transfer to a rack or plate to cool for around 10 minutes. Tips & Variations: • This recipe is easily made gluten-free just use a gluten free cake mix. • Crushed candy cane is usually available at bulk food stores • Not a fan of chocolate? No problem, use a white cake mix, omit the chocolate chips, or use white chocolate
0 Comments
This no-bake recipe is the perfect way to still enjoy a tropical treat in the summer heat! 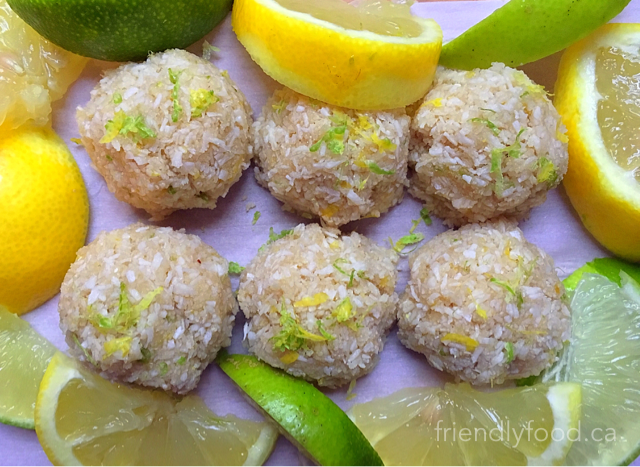 Prep Time: 20 minutes Makes: 12 Main Ingredients: 1 cup shredded unsweetened coconut 1 cup almond flour (also called almond meal) 2 tbsp maple syrup OR agave nectar 2 tbsp coconut oil 1 tsp lemon juice 1 tsp lime juice Zest of ½ lemon Zest of ½ lime Pinch of salt 1 tsp vanilla Optional Topping: Zest of ½ lemon Zest of ½ lime Method: In a large bowl, blend all ingredients together until well incorporated. Using a small ice cream scoop or your hands, form small bite sized macaroons and top with additional lemon-lime zest mixture. Store in an airtight container in the refrigerator for up to one week. A classic crowd pleaser – if you want to share, that is! 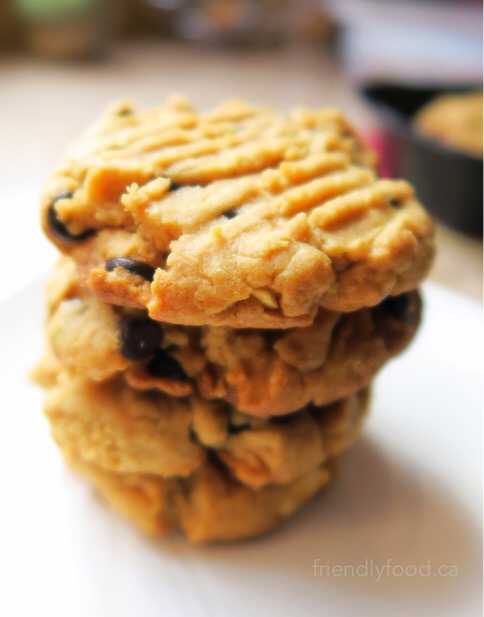 Prep and Cooking: Makes: 24-30 cookies Main Ingredients: 1 cup natural crunchy peanut butter – or substitute whatever nut butter or nut butter blend you like or have on hand *if you are using smooth nut butter, add ¼ cup chopped nuts ½ cup light coconut sugar or cane sugar ½ cup brown sugar 2 tsp vanilla extract ½ cup plant-based butter – you can substitute coconut oil, however the cookies will have a different texture and taste 2-3 tbsp plant-based milk or cream 1 ½ cups flour – use a gluten-free blend if needed 1 tsp baking soda 1 tsp baking powder pinch of salt pinch of cinnamon 1/3 cup chocolate chips ¼ cup finely chopped peanuts (optional for extra crunch) Method: Preheat over to 350°F and line two baking sheets with parchment paper. In a large mixing bowl, combine peanut butter, sugars, vanilla, and butter. Cream the ingredients together until blended and no lumps remain and set aside. In a separate bowl, combine; flour, baking soda, baking powder, salt, and cinnamon. Blend until all dry ingredients are incorporated. Gradually add the dry ingredients to the wet. Stir to combine adding milk or cream 1 tbsp at a time as needed. The dough should be soft and easily hold a ball shape. Add chocolate chips and additional nuts and stir to incorporate. Roll dough into golf ball sized rounds and, using a fork, press the cookies into a round, flattened shape. If the cookies split, simply press the edges back together using your hands. Bake for 15-20 minutes. The cookies should have a golden brown edge and bottom when done. It can be difficult to see this as the cookies are a golden colour to begin with. You can check for doneness by using the edge of a fork or small spatula to lift a cookie gently to check the bottom. The cookies may break when you do this so only check one and do so gently, keeping in mind that a broken cookie is usually the baker’s treat. Allow the cookies to cool completely and store in an airtight container for up to one week. Tips & Variations:
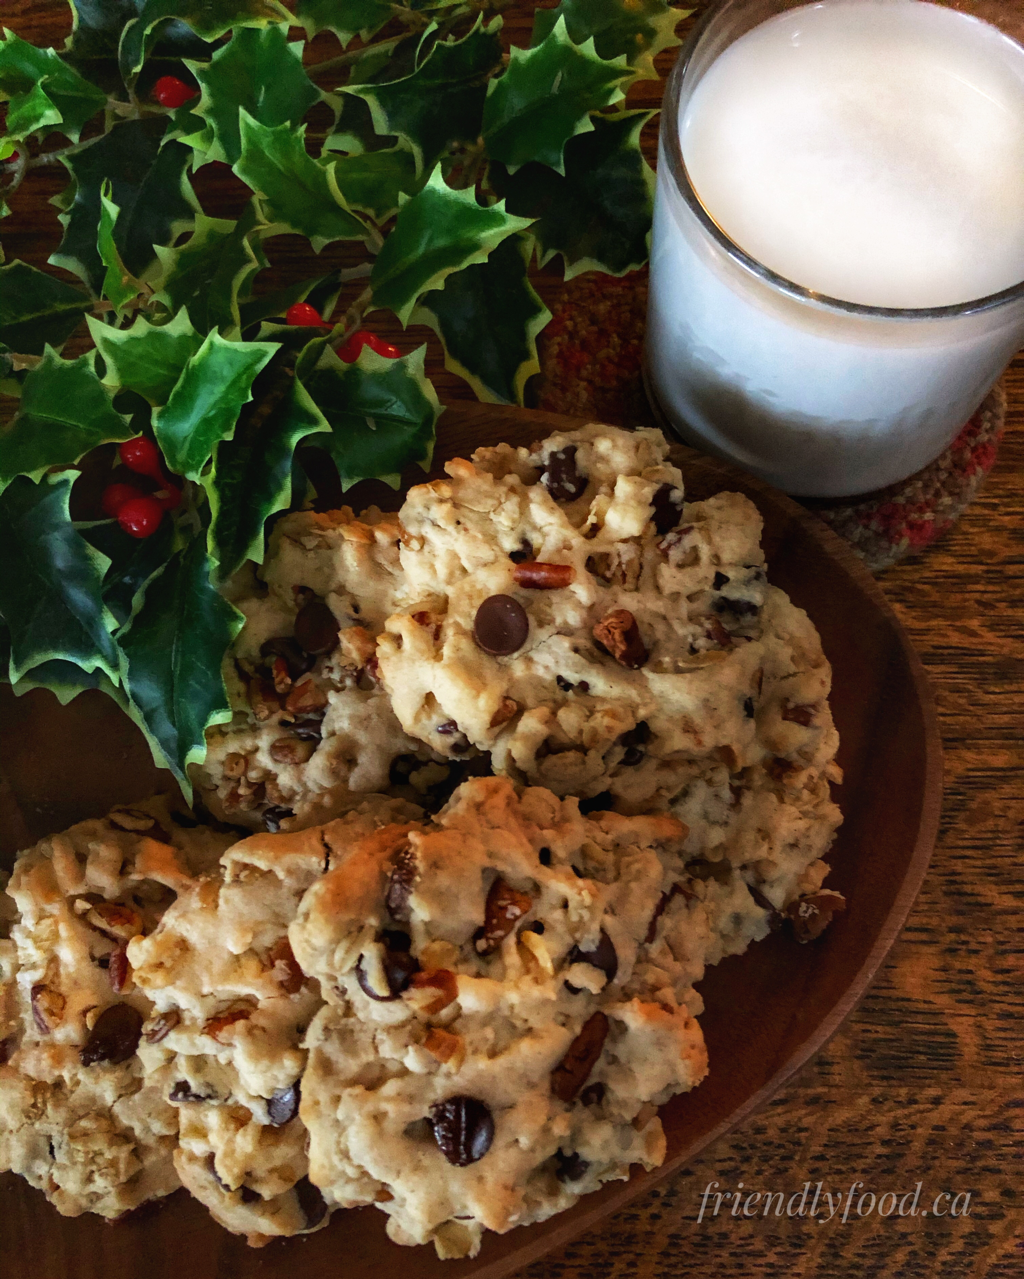 Soft-baked, nutrition packed, hand-held fuel! Prep & Cooking: 30 mins Makes: 10 cookies Main Ingredients: ¼ cup shredded carrot ¼ cup shredded apple ¼ cup shredded zucchini 2-3 tbsp melted coconut oil - if you want the cookies to be oil free substitute the same amount of applesauce 2-3 tbsp molasses 2 tbsp chia seeds 1 cup quick cook oats 1 cup oat flour – if you don’t have oat flour then use what is available or grind oats into a flour using a blender or food processor 1 tsp baking soda 1 tsp baking powder 1 tsp vanilla 2 tbsp hemp hearts (optional) ¼ cup pecans – use what you have on hand, walnuts work well too ¼ cup raisins or dried cranberries ¼ cup shredded coconut (optional) Method: Preheat oven to 350 °F and prepare two cookies sheets. In a large bowl, mix together the molasses, oil, vanilla, and chia seeds. Set this mixture aside allowing the chia seeds to sit in the liquid while you combine the dry ingredients. In a separate bowl, mix together flour, oats, baking soda, and baking powder. Add the shredded fruit and vegetables to the wet ingredient mixture; and stir to combine. Gradually incorporate the dry ingredients into the wet mixture, stirring to combine. Depending on the moisture content of your fruit and vegetables, you may need to add water or plant milk a tablespoon at a time to help the mixture come together. When the wet and dry ingredients are combined, add the pecans, raisins, and coconut. Stir to combine. The mixture will be sticky and you may want to wet your hands before handling it. Using your hands or two spoons, drop the batter onto a prepared cookie sheet. Shape the batter into round forms, patting them out to around 2 ½ inches in diameter and approximately ½ thick or less. Bake the cookies for 12-15 minutes. The cookies will darken considerably when baked. These breakfast cookies are soft, but when done should be firm enough to hold their shape. Tips & Variations
 A satisfying and sweet on-the-go snack! Prep & Cooking: 25 minutes Makes: 15-20 pieces Main Ingredients: ¾ cup raw cashews ¼ cup raw almonds 1/3 cup dried cranberries 6-7 Medjool dates, pitted and quartered - I use medjool because they tend to stay fresh and are easily blended as are most fresh dates, if fresh dates aren’t available or you have dried dates on hand soak them for about 30 minutes in hot water before continuing with the recipe. The dates pictured below are fresh. 1 tsp vanilla 1 tsp cinnamon Pinch of salt Optional Topping: 2-3 tbsp finely chopped cashews Method: In a food processor, chop almonds and cashews until fine (see photo below). Add dates, cranberries, vanilla, salt, and cinnamon. Continue processing until all ingredients are incorporated; often the ingredients will come together and form a ball in the processor. Unplug your food processor and remove the mixture. The mixture should hold together easily when pinched, if not, continue processing for approximately 1 minute. If the mixture is still too dry, add an additional pitted chopped date or two, one at a time, and process. Roll into 1” balls. Leave plain or roll in chopped cashews. These bites make a great on-the-go snack or a great addition to a packed lunch. They keep for around a week in an airtight container in the fridge. If you are travelling with these, be sure to store them in a hard-sided container to avoid squishing. A simple yet decadent treat perfect for Holiday indulging!  Prep Time: 30 minutes Makes: approximately 20 cookies Main Ingredients: 1 package (approximately 300 grams or 20 cookies) of chocolate sandwich cookies, you know the kind; white creamy centre between two thin chocolate cookies *use a gluten-free variety if needed 250-300 grams dark or semi-sweet chocolate (not baker’s chocolate) – you can use a chopped bar of chocolate or chocolate chips, just look for the weight on the packaging Decorative sprinkles, chopped nuts, crushed candy cane etc. for topping Method: If using a bar of chocolate, chop it in to small pieces (see photo). In a double boiler, melt chocolate pieces or chips over medium-high heat until all pieces are melted and the chocolate is smooth. Alternatively, you can melt chocolate chips in a microwave safe bowl on medium-high for one minute and in 20 second intervals after that, stirring at each interval until the chips are melted and smooth. While the chocolate in still warm, using a fork or slotted spoon, dunk and coat each sandwich cookie. You may need to give each cookie a gentle shake to remove excess chocolate. After coating the cookie, place them onto a parchment or wax paper lined cutting board or on a cookie cooling rack with paper underneath to catch drips. Decorating small batches of 4-6 coated cookies at a time seems to work best and the decorations will adhere better to warm chocolate. Allow these coated and decorated cookies to cool at room temperature for 20-30 minutes before enjoying or packaging. Place parchment or wax paper in between cookies when packaging to ensure that the cookies won’t stick together and that your decorations will stay intact. Cooled cookies can be kept in the fridge, but they are best stored at room temperature to avoid any discolouration of the chocolate. Tips & Variations:
A bite-sized cookie with a tangy sweet filling 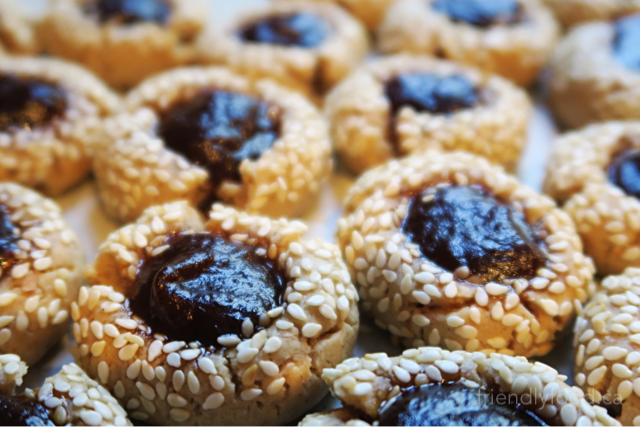 Prep & Cooking: 30 mins Makes: 12-15 cookies Main Ingredients: ½ cup all purpose flour ½ whole wheat flour – you can substitute the full 1 cup of flour with a gluten free blend if needed ¼ cup + 1 tbsp tahini (sesame butter) ¼ cup maple syrup 1 tsp vanilla 1 tsp cinnamon Pinch of salt 3-4 tbsp raw sesame seeds 3-4 tbsp apple butter – apple butter is a thick, dark, concentrated spread and can be found in most grocery and bulk stores in the same section as jam and peanut butter Method: Preheat oven to 350°F and line two cookie sheets with parchment paper. In a large bowl, combine tahini, maple syrup, vanilla, salt, and cinnamon. Stir until smooth and any lumps of tahini have been smoothed out. Add flour(s) and stir to combine. This dough is quite stiff and it may take some effort to incorporate the dry ingredients. When the dough is ready to roll, it should stay together when pinched. If the dough is too dry add water, a tsp at a time, until desired consistency is reached. Roll dough into 1 inch balls and dip or roll into the sesame seeds. The idea is to cover just the top half of the cookie ball in seeds, if you coat the entire dough ball the seeds on the bottom of the cookie may burn as the cookies bake. Using your thumb or the end of a kitchen tool or small bottle, I used the end of a wooden vegetable peeler, press the centre of the cookie to create a well. You only want to press about ½ to ¾ of the way through the cookie or as the cookie bakes the apple butter will run through the bottom. Creating the indent in the centre of the cookie will sometimes create cracks on the edges, just pinch these together with your fingers if the cracks are wide enough to allow the apple butter to seep out. Fill each cookie with a teaspoon or so of apple butter; being careful not to overfill. Bake the cookies for 10-12 minutes. Allow the cookies to cool and store in an airtight container for up to one week. If the cookies will be stacked during storage, place some parchment or waxed paper in between the cookies to avoid sticky bottoms. 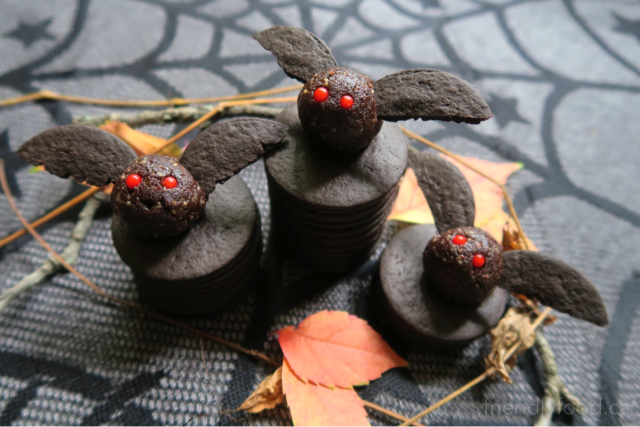 Get them while you can...they only come out at night! Prep & Cooking: 20 minutes Makes: 6-8 bats Main Ingredients: 1/3 cup nuts – pecans or walnuts work best, or use a combination of both 4-5 medjool dates, pitted and chopped 1 tsp vanilla extract pinch of salt 1 tbsp cocoa powder Small red candies, such as; pieces of jellybean or chopped cranberries to be used for bat eyes 10 chocolate cookies – cutting them can be tricky so having a few extras is a good idea *you can use plain chocolate wafer cookies or remove the cream from chocolate sandwich cookies. Sandwich cookies will likely be your best bet if you need or want a gluten free bat-wing option. Method: In a food processor, chop nuts until fine (see photo). Add dates, vanilla, and salt. Continue processing until all ingredients are incorporated. Add cocoa powder and continue processing until completely blended. Unplug your food processor and remove the mixture. The mixture should hold together easily when pinched, if not, continue processing for approximately 1-2 minutes; if mixture is still too try add an additional pitted chopped date and process. Roll into 1” balls and refrigerate for a few minutes while creating the chocolate cookie wings. Break cookies in half by hand or using a knife. You may wish to use the point of a knife to create rough edges on the wings. Using a toothpick, create two small holes in the chocolate ball to place the red candy or cranberry eyes. After the eyes are in place, again, using a toothpick, create two small slits in either side of the chocolate ball to hold the wings. This works best if the chocolate balls are chilled in the refrigerator for a few minutes beforehand. These bites make a cute addition to your Halloween snack tray or a spooky addition to a packed lunch. If you are making them ahead, store the chocolate balls in the refrigerator and add the eyes and wings before serving. If you are travelling with them be sure to store them in a hard-sided container to avoid squishing. Nightmarish nibbles to please even your most ghoulish guests! 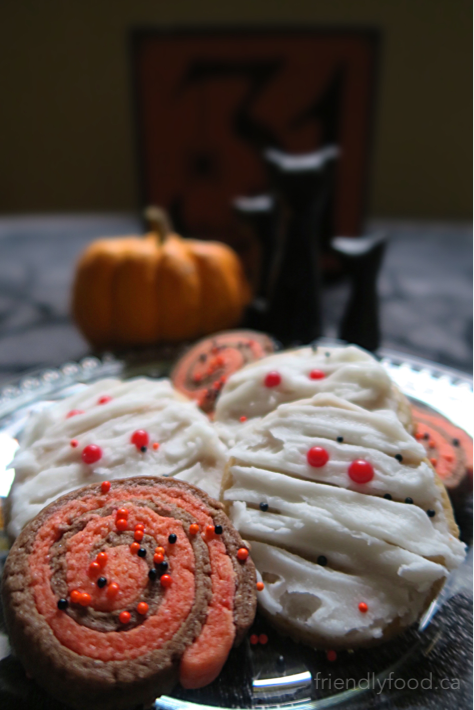 Prep & Cooking: 1 hour (plus cooling and frosting time) Makes: 18-24 cookies depending on thickness Cookies Main Ingredients: 1 cup all purpose flour, or gluten free blend 1/3 cup sugar 1 tbsp maple syrup or agave nectar (optional) 1 tsp baking powder 2 tsp pumpkin pie spice (optional) 1/3 cup plant-based butter 2 tsp vanilla extract 1 tbsp plant-based milk Pinch of salt Yummy Mummies Cookie additions: Small red candies, such as; pieces of jellybean or chopped cranberries to be used for Mummy eyes Frosting – see recipes below Spooky Spiral Cookie additions: 1 tbsp cocoa powder A few drops of orange or combine red and yellow food colouring Halloween coloured sprinkles (optional) Method: Preheat oven to 350°F and line two baking sheets with parchment paper. In a large mixing bowl, combine dry ingredients. In a separate bowl, cream together butter, sugar, and vanilla. Add the dry ingredients to the sugar mixture and stir together until all ingredients are incorporated and there are no lumps. Separate the dough in half and one half again. You should have three pieces of dough, one larger than the other two. The two smaller pieces of dough will be tinted with cocoa powder and food colouring for a Halloween effect. Add the cocoa to one piece of dough and work through with a spoon or clean hands until a uniform dark brown colour is achieved. Do the same with the second small piece of dough and the food colouring to create an orange colour. The dough should be firm and easy to roll into three balls. Refrigerate the dough balls for 10-20 minutes while you make the frosting. (Cookie Method continued below) Frosting Main Ingredients: 1 cup powdered sugar 1 tbsp plant-based milk ½ tsp vanilla Method: In a bowl, blend together all ingredients until no lumps remain; using a fork can help to break up any lumps of powdered sugar. The frosting should be thick and spreadable. If it is too runny, add more sugar 1 tbsp at a time. These cookies are best frosted no more than a day before you plan to eat them. They can be stacked in a container after the icing has firmed up, but to be safe, place parchment or waxed paper in between layers of cookies. Cookie Method Continued: Remove the plain dough from the refrigerator and roll out on a floured surface to around a ¼ of an inch. Using a 2 inch cutter, a mason jar, or any other round cutter, cut around 10-12 circular cookies. Transfer to the prepared baking sheets and bake for 8-10 minutes. While the Yummy Mummies are baking get started on the Spooky Spirals. Roll each of the coloured dough balls out into a rectangle approximately ¼ inch thick. The rectangles should be about 4”x 8”. Place one rectangle on top of the other (see photos) and roll together tightly on the short side. When the spiral roll is complete, cut the dough log into ¼ inch slices using a sharp knife. This will create around 8-10 cookies. Top the cookies with coloured sugar or sprinkles if you choose and transfer the spiral cookies to the prepared cookie sheet to bake for 10-12 minutes. Transfer warm cookies to a cooling rack and allow to cool for about 10 minutes. When cookies are cooled completely frost the Yummy Mummies with the frosting recipe found above, or if you would prefer to use something you have purchased – go for it! Frost the cookies by evenly coating the cookies one at a time with a thin layer and allow frosting to set as you complete them one at a time. Beginning with the first frosted cookie, add additional icing, thicker this time, using a knife and spreading the frosting from side to side; the messier the better to create a bandaged effect. Place the red candies or cranberries on as eyes and give the cookies a few minutes to set. Tips & Variations:
A nut-free, on-the-go snack to keep you satisfied! Lunch-box safe too!  Prep: 10 minutes Makes: around 10 bites Main Ingredients: 1 cup rolled oats (not quick oats) ¼ cup sunflower butter 3 tbsp maple syrup 2 tbsp shelled sunflower seeds 2 tbsp chocolate chips (optional) ¼ tsp salt (optional) Method: In a medium bowl, combine all ingredients and stir to combine. Form mixture into 1 inch balls and place in an airtight container. Store bites in the refrigerator for up to 2 weeks and enjoy! Tips & Variations:
|

Archives
December 2020
Categories
All
|