|
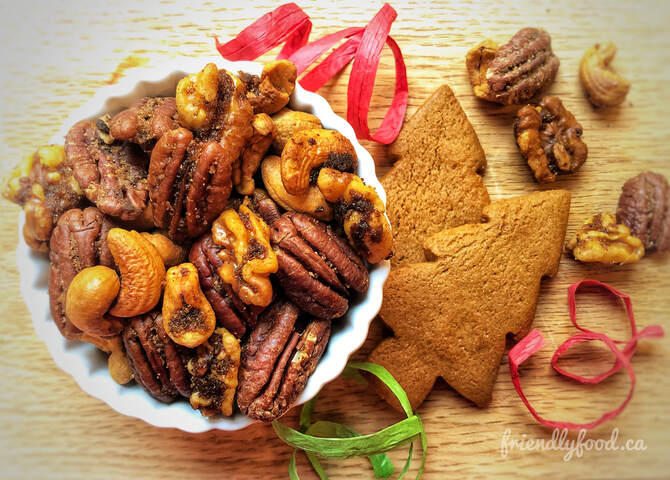
A Crunchy Snack Dusted with Holiday Inspired Flavour Prep & Cooking: 20-25 minutes
Makes: 3 cups Main Ingredients: 3 cups of whole raw nuts (not roasted or salted), a combination of pecans, cashews, and walnuts works best, but use what you have. 3 tbsp brown sugar or coconut sugar 2 tablespoons melted plant-based butter ½ tbsp of molasses ½ tsp each cinnamon, nutmeg, allspice, and ginger Pinch of ground cloves Pinch of salt Method: Preheat your oven to 350° and prepare a baking sheet. In a large bowl, combine sugar, salt, spices, molasses, and oil. Add the nuts and toss until evenly coated. Bake for 10-15 minutes; stirring once every 5 minutes. Watch the nuts closely as they will burn easily. Your nose knows! If you can smell toasted nuts, it’s time to take them out. Allow the nuts to cool before serving. Tips & Variations:
0 Comments
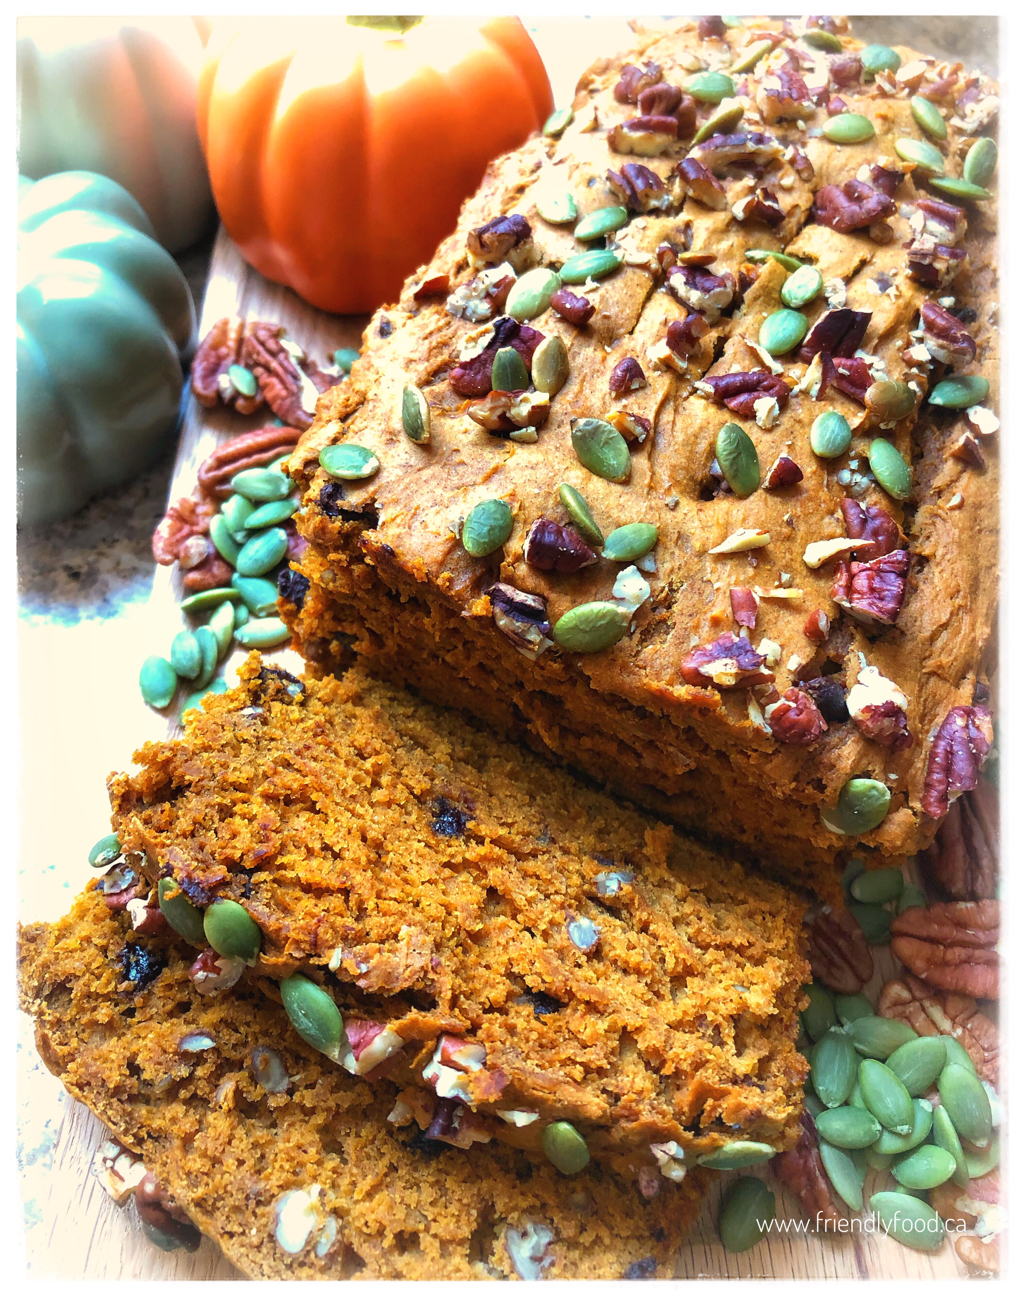
Seasonally Sweet & Spicy Prep & Cooking: 15 mins prep, 20-55 mins to bake
Makes: 1 loaf or approx. 12 muffins Main Ingredients: 1 - 368 ml (15 oz) can of pumpkin puree (not pie filling) 2 flax eggs or egg substitute of your choice • Each flax egg consists of 1 tbsp ground flaxseed and 2 tbsp water – combine water and ground flax and allow to sit for 5 minutes to thicken before adding to your recipe. 2 cups of all-purpose flour or gluten free baking blend 1 tsp baking soda 1 tsp baking powder ¼ cup brown or coconut sugar 1-2 tbsp pumpkin pie spice (start with 1 tbsp and add more to taste) ¼ cup vegetable oil or melted coconut oil 1 tbsp molasses (optional) Pinch of salt 1/3 cup chocolate chips 1/3 cup chopped pecans Optional additions or toppings: chopped pecans and/or raw pumpkin seeds Method: Preheat oven to 350° and prepare a loaf pan or 2 muffin trays. In a large bowl, combine oil, sugar, pumpkin, molasses, and flax eggs. Stir to combine. In a separate bowl, combine flour, pumpkin pie spice, baking soda, baking powder, and salt. After the dry ingredients are mixed, add them to the wet ingredients and stir to combine. Add the chocolate chips and pecans and optional pumpkin seeds to the batter and gently fold the batter until incorporated. Fill your loaf pan and pat the batter down with a spoon or rubber spatula to pop any air bubbles. If you are opting for muffins, fill each of your prepared muffin cups around ½ of the way full. Whether you are making a loaf or muffins, you can dot the tops with additional chopped nuts and pumpkin seeds if desired. Bake at 350°F for 45-55 minutes for a loaf, or 20-25 minutes for muffins. Use a toothpick or knife to test the centre of the loaf or muffins; when it comes out clean they are done. Allow to cool for around 10-15 minutes before removing from the pan. Tips & Variations: • Easily convert this loaf recipe into around 12 muffins, fill muffin tins ½ full, top with optional pecans and/or pumpkin seeds and bake for 20-25 mins Short on time? This quick & festive cookie has you covered! Prep & Baking: 20 minutes
Makes: 24 medium sized cookies Main Ingredients: 1 box of chocolate cake mix – most grocery stores have a variety of both conventional, organic, and gluten free to choose from 2 tsp peppermint extract ½ cups chocolate chips, chunks or pieces (optional) 1/3 cup vegetable oil ¼ cup water 1/3 cup or more crushed candy cane Method: Preheat oven to 350°F and line two baking sheets with parchment paper. In a large mixing bowl, combine dry cake mix with oil and water. Stir together until all ingredients are incorporated and there are no lumps. Add in chocolate chips and peppermint extract and mix well. Roll dough into approximately 1 inch balls and dip the tops of the cookie balls into the crushed candy cane; coating the top half of the cookie in candy. Place the dough balls on prepared cookie sheet. These cookies will spread so leave plenty of room between each dough ball. I recommend putting no more than 8 cookies on each sheet. Bake the cookies for 10-12 minutes then transfer to a rack or plate to cool for around 10 minutes. Tips & Variations: • This recipe is easily made gluten-free just use a gluten free cake mix. • Crushed candy cane is usually available at bulk food stores • Not a fan of chocolate? No problem, use a white cake mix, omit the chocolate chips, or use white chocolate Dark chocolate flavour combined with rich pistachios and cashews for an indulgent and nutritious snack Prep: 20 minutes
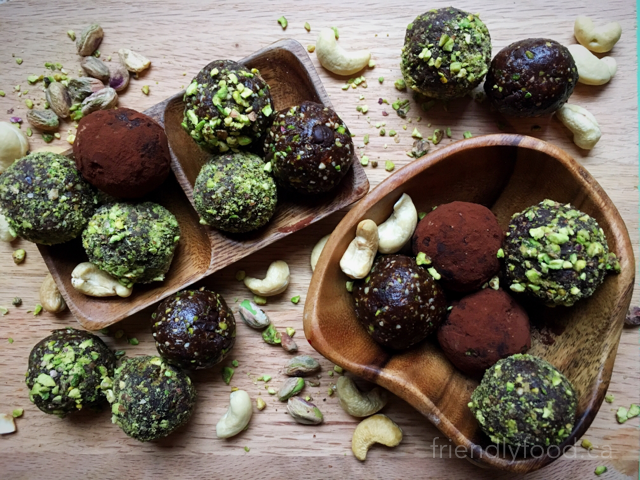
Makes: 12-15 pieces Main Ingredients: ½ cup raw unsalted shelled pistachios ¼ cup raw cashews 7-8 Medjool dates, pitted and quartered – I use medjool because they tend to stay fresh and are easily blended ¼ cup cocoa powder 1 tsp vanilla Pinch of salt Optional Toppings: Cocoa powder for dusting Chopped pistachio pieces Chocolate pieces or chips Method: In a food processor or blender, chop pistachios and cashews until fine. Add dates, cocoa, vanilla, and salt. Continue processing until all ingredients are incorporated, often the ingredients will come together and form a ball in the processor. Unplug your food processor and remove the mixture. The mixture should hold together easily when pinched, if not, continue processing for approximately 1-2 minutes, if mixture is still too dry, try adding an additional pitted chopped date and process. Form into 1” balls. You can top each ball with chopped pistachios, chocolate pieces, dust with cocoa powder, or leave plain. These pistachio bites add a pop of colour to a holiday dessert tray or make a perfect treat for gifting. They keep for around a week in an airtight container in the fridge. If you are travelling with these, be sure to store them in a hard-sided container to avoid squishing. Tips & Variations:
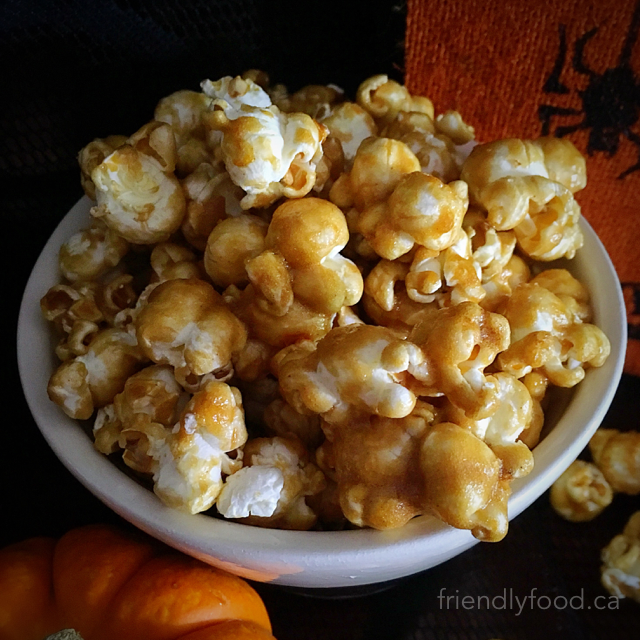
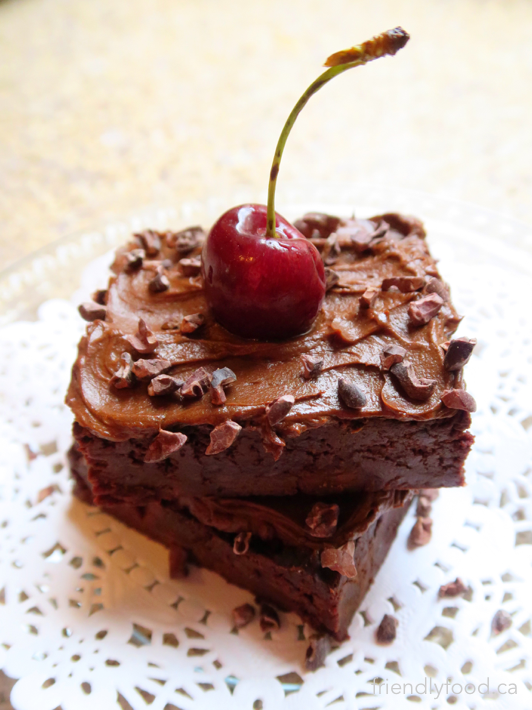
A sweet and spiced treat for spooky October nights Prep & Baking Time: 45 Makes: 10-12 cups Main Ingredients: 10-12 cups popped popcorn, lightly salted 1 cup brown sugar or coconut sugar ½ cup plant-based butter ¼ cup agave nectar or corn syrup ½ tsp baking soda 1 tbsp vanilla ½ tsp ground cinnamon ¼ tsp ground ginger Pinch of ground nutmeg and ground clove *use as much or as little of these spices as you like, develop your own combination that suites your taste! * alternatively use 1 – 1 ½ tsp of pre-mixed pumpkin pie spice Method: Preheat oven to 250°F. Line two baking sheets with parchment paper. In a 4 cup or larger microwave safe glass container, preferably with a handle, combine sugar, syrup, and butter. Microwave the mixture for 30 seconds, remove and stir to blend the melted butter with the sugar-spice mixture. Return the mixture to the microwave and heat the mixture for an additional 2 minutes; be sure to watch the mixture to avoid any boil over. Remove, and again, stir to make sure all the sugar is heating evenly and that there are no lumps. Return the mixture to the microwave for one last heating of 1 minute and 30 seconds. Be sure to have your baking soda and vanilla ready to add as soon as the bubbling mixture is removed from the microwave. *The sugar mixture will be very hot, this is not something to do while distracted and should not be attempted by children. Add the vanilla and the baking soda and stir vigorously to combine. The mixture will lighten in colour and become frothy. Be sure that all of the baking soda is mixed through and pour the hot golden mix over the waiting popcorn. Using a large spoon or rubber spatula, fold the spiced sugar syrup into the popcorn. You want to be gentle so that you don’t crush the popcorn, but be sure to work quickly while the mixture is still warm. Spread the coated popcorn out onto the two lined baking sheets as evenly as possible. Bake for 30 minutes total removing the sheets to stir the popcorn every 10 minutes. Allow the caramel corn to cool for 15-20 minutes before serving or storing in air tight containers for up to one month. This popcorn is so tasty and likely won’t last long, but if you are able to tuck some away be sure that the container has a tight seal. Even then you may need to give it a shake after storage to help break up any stuck pieces. Cherries & chocolate with a hidden veggie advantage that can’t be beet! Prep & Baking: 30 minutes (plus cooling time before frosting) Makes: 9 large brownies, 16-20 small brownies Pairs well with: Coconut Whipped Topping Main Ingredients: ½ cup finely shredded or processed beets (in a food processor or blender) approximately 3 small cooked beets ½ cup dried cherries 1 cup all purpose, whole wheat, or gluten free flour blend ¼ cup coconut sugar ½ cup vegetable or liquid coconut oil ½ cup cocoa powder ½ tsp baking powder ½ cup chocolate chips Pinch of salt Pinch of cinnamon Frosting: ¼ cup plant-based butter 2 tbsp cocoa powder 3 tbsp icing sugar ½ tsp vanilla Method: Preheat oven to 350°F and line a 9x9 baking pan or dish with parchment paper or spray with coconut oil. In a food processor or blender, shred the cooked beets into a pulp. Transfer to a large mixing bowl and add coconut sugar and oil. Stir to combine. In a separate bowl, combine remaining dry ingredients; flour, cocoa powder, baking powder, salt, and cinnamon. Stir to combine. Gradually add the dry ingredients mixture to the wet and stir to incorporate. When the dry and wet ingredients are thoroughly mixed and no lumps remain, fold chocolate chips and dried cherries into the mixture. Transfer batter to a prepared 9x9 baking pan or dish and bake for 25 minutes. To check if brownies are baked through insert a toothpick or clean knife into the middle of the brownies, it should come out clean. If batter remains uncooked, continue baking in 5 minutes intervals. Allow brownies to cool completely before topping with frosting. If you prefer a thicker layer of icing, as shown in the photo, we suggest doubling the frosting recipe. Tips & Variations:
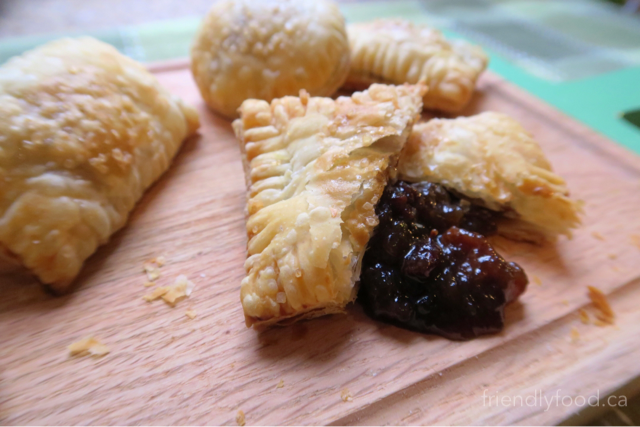
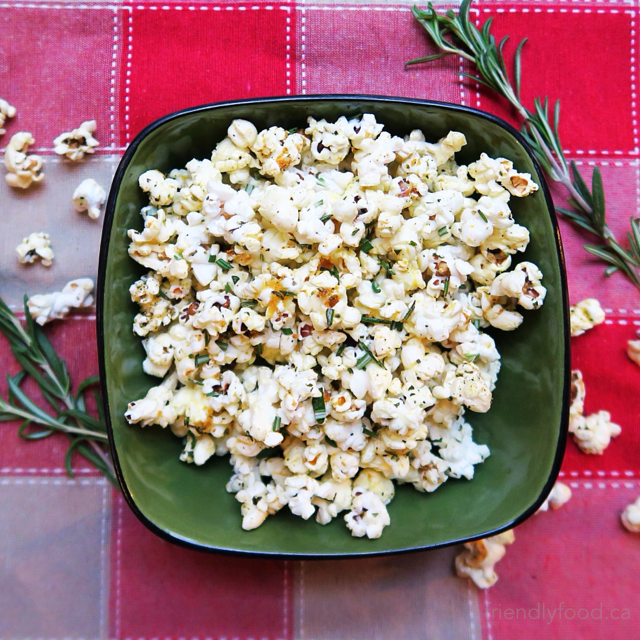
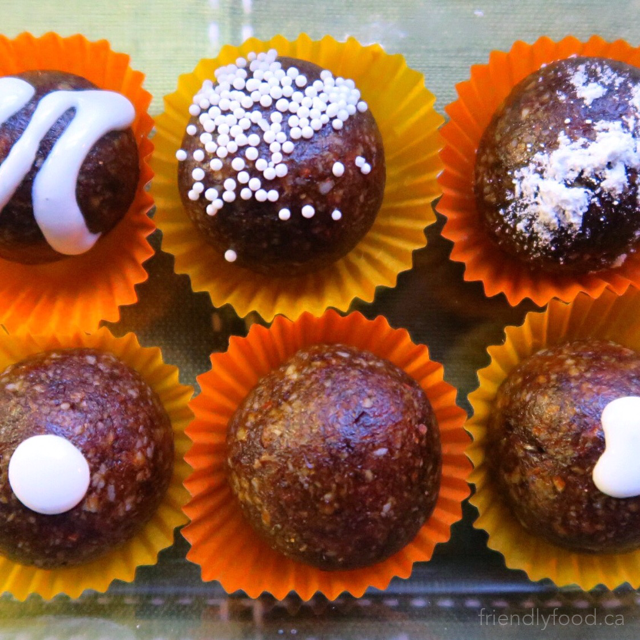
A new take on a traditional favourite! Prep & Cooking: 30-40 minutes Makes: 24 parcels (depending on cutter size) Main Ingredients: 1 package puff pastry thawed (usually contains 2 sheets around 10”x10”) – if you have the time and skill to make puff pastry great! If not, there likely are plant-based options at your grocery or health food store in the freezer section 1 ½ cup mincemeat filling – the name can be deceiving as many prepared mincemeat fillings are vegetarian or even vegan, read the label and if you want plant-based be sure there is no beef suet included or look for a label that indicates that it is suitable for your needs ¼ cup plant milk Turbinado sugar or other coarse sugar (optional) Method: Preheat oven to 375 °F and line two baking sheets with parchments paper. On a floured surface, use a sharp knife or pizza cutter to cut the sheets, one at a time, into 12 equal pieces. If you would like round parcels, use a 2 ½ inch cutter. In a pinch you can use a metal ring from a standard mason jar. In the centre of half of the cut pastry pieces place 1 tablespoon of mincemeat. Using a small brush or fingertip paint the edges of the pastry with milk. This will help the bottoms and tops stick together while baking. Cover each of the bottom pieces with a matching top and crimp the edges with a fork to seal each parcel. Using a toothpick, prick several small holes in the top of each parcel creating vents to avoid the pastry splitting while baking. Dab the tops of each parcel with additional milk and sprinkle with turbinado sugar. Bake for 15-20 minutes, until edges are golden brown. Allow the parcels too cool for approximately 10 minutes before serving. The pastries can be stored in an airtight container for up to one week but are best if eaten straight away. A fragrant and flavourful holiday snack! Prep & Cooking: 10-15 minutes Makes: 6 cups Main Ingredients: 6 cups of popped popcorn (approximately ¼ cups of kernels) ¼ cups olive oil 4 tsp finely chopped fresh rosemary 3 tsp sea salt 2 tsp garlic powder 1 tsp onion powder 1 tsp freshly ground pepper 1 tbsp roughly chopped fresh rosemary (optional) Method: In a small saucepan over low heat, warm the olive oil, finely chopped rosemary, salt, garlic powder, and onion powder. Heat for 5-7 minutes, stirring frequently to avoid any burning. Watch the oil closely as it will begin to smoke if the heat is too high. You may begin to smell the rosemary, this is expected, but if you smell burning remove the saucepan from the heat immediately. When the oil is heated through, remove from the heat and drizzle over the popcorn. Toss gently to coat evenly and top with additional roughly chopped rosemary. The flavour intensifies as the oil cools. Store in an airtight container for up to one week. A sweet & chewy surprise enrobed in bitter dark chocolate Prep Time: 30 minutes Makes: approximately 15 truffles Main Ingredients: 250 grams (approximately 1 cup) almond paste chopped into 1 inch pieces or smaller 1/3 cup dried cherries, chopped ½ cup chopped dark chocolate or semi-sweet chocolate chips, melted Chopped or slivered almonds for topping (optional) Method: Your almond paste will need to be soft enough to incorporate the dried cherries and roll into balls. As you handle the paste, it will likely soften, but if your almond paste is firm, heat it for 10-20 seconds in the microwave. Add chopped cherry pieces to the warmed or softened almond paste, working them in by folding the paste over by hand. When the cherry pieces are evenly incorporated, roll the paste into one inch balls. If using a bar of chocolate, first chop it in to small pieces (see photo). In a double boiler, melt chocolate pieces or chips over medium-high heat until all pieces are melted and the chocolate is smooth. Alternatively, you can melt chocolate chips in a microwave safe bowl on medium-high for one minute and in 20 second intervals after that, stirring at each interval until the chips are melted and smooth. While the chocolate is still warm, using a toothpick or small fork, pierce the almond paste ball and dunk in or spoon over melted chocolate to coat. You may need to give each truffle a gentle shake to remove excess chocolate. After coating the truffle place them onto a parchment or wax paper lined cutting board. You may wish to add a small drop of chocolate to the top of each truffle to cover any holes. Decorating small batches of 4-6 truffles at a time seems to work best and the nuts will adhere better to warm chocolate. Allow these coated truffles to cool at room temperature for 20-30 minutes before enjoying or packaging. Using small foil or paper confectionary cups, like mini muffin wrappers, will ensure that the truffles won’t stick together and that the almond pieces will stay intact. Cooled truffles can be kept in the fridge, but they are best stored at room temperature to avoid any discolouration of the chocolate. These make a tasty and special gift – especially if the receiver is a fan of chocolate and cherry together! All the flavour of an entire gingerbread house in one bite! Prep & Cooking: 25 minutes Makes: 15 pieces Main Ingredients: ¾ cup raw almonds 6-7 Medjool dates, pitted and quartered – I use medjool because they tend to stay fresh and are easily blended, as are most fresh dates. If fresh dates aren’t available or you have dried dates on hand soak them for about 30 minutes in hot water before continuing with the recipe 1 tbsp molasses 1 tsp vanilla ¾ tbsp ground ginger 1 tsp cinnamon ¼ tsp nutmeg Pinch of salt Pinch of ground cloves Optional Topping: 2-3 tbsp icing sugar or click here to try our frosting recipe from Halloween! Method: In a food processor, chop almonds until the consistency of sand. Add dates, vanilla, molasses, ginger, cinnamon, nutmeg, cloves, and salt. Continue processing until all ingredients are incorporated; often the ingredients will come together and form a ball in the processor. Unplug your food processor and remove the mixture. The mixture should hold together easily when pinched, if not, continue processing for approximately 1 minute. If the mixture is still too dry, add an additional pitted chopped date or two, one at a time, and process. Roll into 1 inch balls. Leave plain, roll in icing sugar or drizzle with frosting. These bliss bites are a tasty addition to any holiday treat tray and also make a fun gift. They keep for around a week in an airtight container in the fridge. If you are travelling with these, be sure to store them in a hard-sided container to avoid squishing. |
Archives
December 2020
Categories
All
|
