|
A quick and crunchy addition to any snack platter 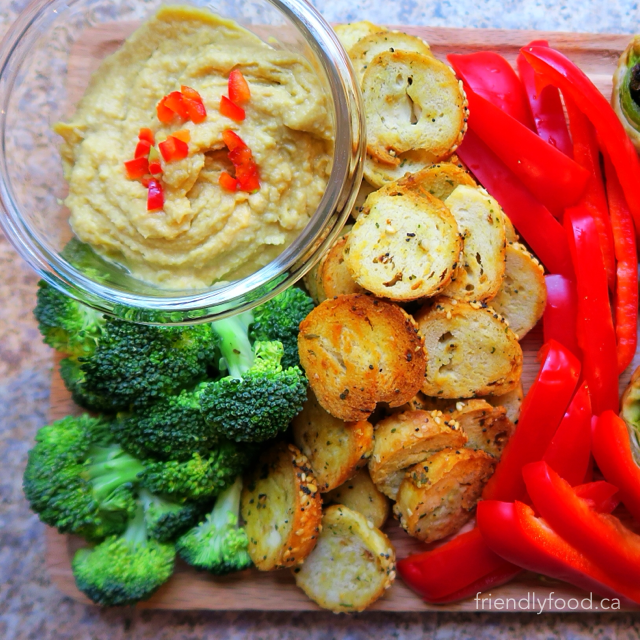 Prep & Cooking: 25 minutes Serves: 8 Pairs well with: Smoky White Bean Dip & Cashew "Cheese" Spread Main Ingredients: 4 bagels – I used both whole wheat and ‘everything’ bagels, any plain or savoury bagel works well, substitute gluten free bagels if needed *look for bagels that are not pre-sliced, these work best for cutting coin shaped chips 2 tbsp olive oil Seasoning: 1 tsp nutritional yeast – this can be found in most bulk or health food stores and provides the ‘cheesy’ flavour in these chips 1 tsp garlic powder ½ tsp salt ½ tsp ground black pepper 1 tsp dried parsley (optional) Method: Preheat oven to 350°F and prepare a baking sheet by covering with parchment or aluminium foil. Slice each bagel from the top, not through the middle as you would to toast it. Cut the bagel into round slices about ¼ inch thick. In a small bowl, mix together the seasoning ingredients and oil. In a large bowl, place the cut bagel chips and drizzle with the seasoning and oil mixture. Toss to coat. Transfer the seasoned bagel pieces to your prepared baking sheet and arrange in a single layer. Bake for 15 minutes. Allow the bagel chips to cool for around 10 minutes before serving. The baked chips can be stored in an airtight container for up to two weeks. We suggest serving these seasoned bagel chips with our Smoky White Bean Dip or Cashew "Cheese" Spread - Enjoy!
0 Comments
Spiced citrus muffins with a lemony ginger glaze  Prep & Cooking: 30 minutes Makes: 12 muffins Main Ingredients: 3 ripe bananas mashed ¼ cup vegetable or liquid coconut oil ¼ cup coconut sugar 1 ½ tbsp ground cinnamon 1 ½ tbsp ground ginger 1 tsp ground cloves Pinch of salt 1 tsp baking soda 1 tsp baking powder Zest of 1 large orange Zest of ½ lemon 2/3 cup dried cranberries ¼ cup flaked almonds ¼ cup almond milk – or plant-milk of your choice 1 ½ cup flour – use a flour of your choice, a gluten free blend if needed Glaze: ¼ cup confectioner’s sugar 2 tbsp lemon juice 1 tsp each lemon zest and orange zest ½ - 1 tbsp powdered ginger Method: Pre-heat oven to 350°F and prepare a muffin tin. Banana Tip: I use frozen bananas. Freezing ripe bananas is a great way to avoid waste and to have a stash of fruit ready for baking. I remove the banana stem prior to thawing, this creates a nice little opening for the ripe and often very soft fruit to travel through. I then place the bananas, peel on, flat on a plate and microwave them for 1-2 minutes; usually checking every 30 seconds after the first minute. By removing the stem prior to thawing, you will also avoid any bits of burnt banana peel (not a pleasant smell). When the bananas are thawed they can be easily squeezed from their peel right into your mixing bowl. If you have high-powered microwave you may wish to use a low or medium power setting or use the defrost feature instead; this may add a few minutes. In a large bowl, combine oil, sugar, and bananas. Stir to combine and use the back of your mixing spoon to break up the bananas until the mixture is smooth with few to no lumps. If your bananas are still firm you may wish to use a fork or a whisk to mash them. In a separate bowl, combine flour, spice, baking soda, baking powder, and salt. After the dry ingredients are mixed, add them to the wet ingredients and stir to combine. Add flaked almonds and dried cranberries to the batter and gently fold the batter until incorporated. In an additional small bowl, add all of the glaze topping ingredients and stir until combined. Fill each of your prepared muffin cups ¾ of the way full and top with the crumble mixture. Bake for 20-25 minutes. Remove muffins from the oven and test for doneness using a toothpick. When the toothpick comes out clean, the muffins are done. While the muffins are still warm prick several holes in the top of each one and drizzle glaze over the top. The holes will allow the glaze to permeate the muffin creating a sweet centre. Sprinkle with additional toasted flaked almonds for some added crunch. Store in an airtight container for up to one week. A new take on a traditional favourite! 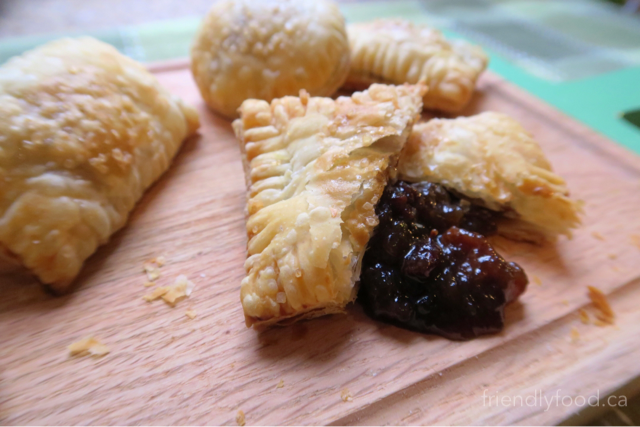 Prep & Cooking: 30-40 minutes Makes: 24 parcels (depending on cutter size) Main Ingredients: 1 package puff pastry thawed (usually contains 2 sheets around 10”x10”) – if you have the time and skill to make puff pastry great! If not, there likely are plant-based options at your grocery or health food store in the freezer section 1 ½ cup mincemeat filling – the name can be deceiving as many prepared mincemeat fillings are vegetarian or even vegan, read the label and if you want plant-based be sure there is no beef suet included or look for a label that indicates that it is suitable for your needs ¼ cup plant milk Turbinado sugar or other coarse sugar (optional) Method: Preheat oven to 375 °F and line two baking sheets with parchments paper. On a floured surface, use a sharp knife or pizza cutter to cut the sheets, one at a time, into 12 equal pieces. If you would like round parcels, use a 2 ½ inch cutter. In a pinch you can use a metal ring from a standard mason jar. In the centre of half of the cut pastry pieces place 1 tablespoon of mincemeat. Using a small brush or fingertip paint the edges of the pastry with milk. This will help the bottoms and tops stick together while baking. Cover each of the bottom pieces with a matching top and crimp the edges with a fork to seal each parcel. Using a toothpick, prick several small holes in the top of each parcel creating vents to avoid the pastry splitting while baking. Dab the tops of each parcel with additional milk and sprinkle with turbinado sugar. Bake for 15-20 minutes, until edges are golden brown. Allow the parcels too cool for approximately 10 minutes before serving. The pastries can be stored in an airtight container for up to one week but are best if eaten straight away. A fragrant and flavourful holiday snack! 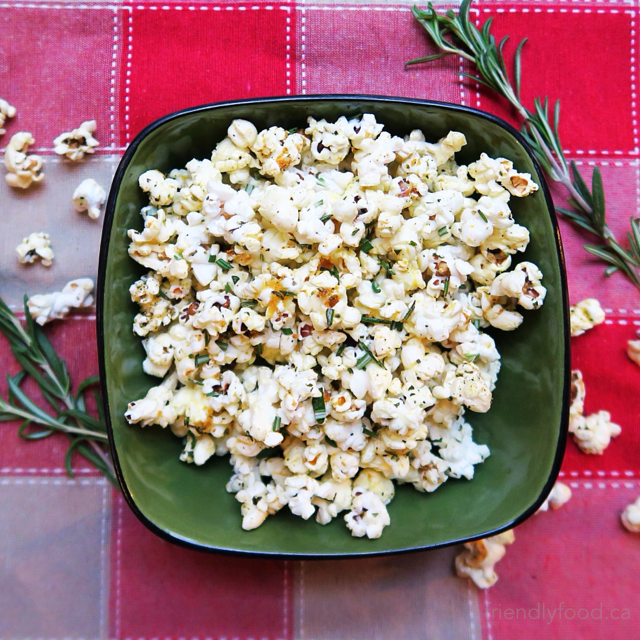 Prep & Cooking: 10-15 minutes Makes: 6 cups Main Ingredients: 6 cups of popped popcorn (approximately ¼ cups of kernels) ¼ cups olive oil 4 tsp finely chopped fresh rosemary 3 tsp sea salt 2 tsp garlic powder 1 tsp onion powder 1 tsp freshly ground pepper 1 tbsp roughly chopped fresh rosemary (optional) Method: In a small saucepan over low heat, warm the olive oil, finely chopped rosemary, salt, garlic powder, and onion powder. Heat for 5-7 minutes, stirring frequently to avoid any burning. Watch the oil closely as it will begin to smoke if the heat is too high. You may begin to smell the rosemary, this is expected, but if you smell burning remove the saucepan from the heat immediately. When the oil is heated through, remove from the heat and drizzle over the popcorn. Toss gently to coat evenly and top with additional roughly chopped rosemary. The flavour intensifies as the oil cools. Store in an airtight container for up to one week. A sweet & chewy surprise enrobed in bitter dark chocolate  Prep Time: 30 minutes Makes: approximately 15 truffles Main Ingredients: 250 grams (approximately 1 cup) almond paste chopped into 1 inch pieces or smaller 1/3 cup dried cherries, chopped ½ cup chopped dark chocolate or semi-sweet chocolate chips, melted Chopped or slivered almonds for topping (optional) Method: Your almond paste will need to be soft enough to incorporate the dried cherries and roll into balls. As you handle the paste, it will likely soften, but if your almond paste is firm, heat it for 10-20 seconds in the microwave. Add chopped cherry pieces to the warmed or softened almond paste, working them in by folding the paste over by hand. When the cherry pieces are evenly incorporated, roll the paste into one inch balls. If using a bar of chocolate, first chop it in to small pieces (see photo). In a double boiler, melt chocolate pieces or chips over medium-high heat until all pieces are melted and the chocolate is smooth. Alternatively, you can melt chocolate chips in a microwave safe bowl on medium-high for one minute and in 20 second intervals after that, stirring at each interval until the chips are melted and smooth. While the chocolate is still warm, using a toothpick or small fork, pierce the almond paste ball and dunk in or spoon over melted chocolate to coat. You may need to give each truffle a gentle shake to remove excess chocolate. After coating the truffle place them onto a parchment or wax paper lined cutting board. You may wish to add a small drop of chocolate to the top of each truffle to cover any holes. Decorating small batches of 4-6 truffles at a time seems to work best and the nuts will adhere better to warm chocolate. Allow these coated truffles to cool at room temperature for 20-30 minutes before enjoying or packaging. Using small foil or paper confectionary cups, like mini muffin wrappers, will ensure that the truffles won’t stick together and that the almond pieces will stay intact. Cooled truffles can be kept in the fridge, but they are best stored at room temperature to avoid any discolouration of the chocolate. These make a tasty and special gift – especially if the receiver is a fan of chocolate and cherry together! All the flavour of an entire gingerbread house in one bite! 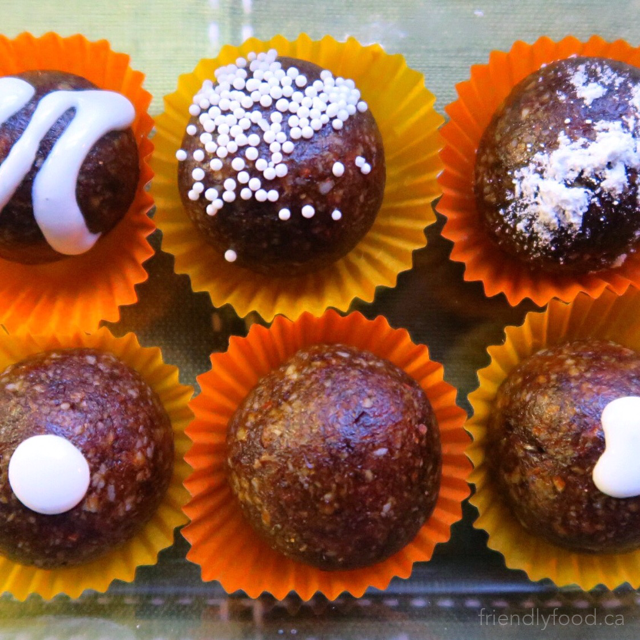 Prep & Cooking: 25 minutes Makes: 15 pieces Main Ingredients: ¾ cup raw almonds 6-7 Medjool dates, pitted and quartered – I use medjool because they tend to stay fresh and are easily blended, as are most fresh dates. If fresh dates aren’t available or you have dried dates on hand soak them for about 30 minutes in hot water before continuing with the recipe 1 tbsp molasses 1 tsp vanilla ¾ tbsp ground ginger 1 tsp cinnamon ¼ tsp nutmeg Pinch of salt Pinch of ground cloves Optional Topping: 2-3 tbsp icing sugar or click here to try our frosting recipe from Halloween! Method: In a food processor, chop almonds until the consistency of sand. Add dates, vanilla, molasses, ginger, cinnamon, nutmeg, cloves, and salt. Continue processing until all ingredients are incorporated; often the ingredients will come together and form a ball in the processor. Unplug your food processor and remove the mixture. The mixture should hold together easily when pinched, if not, continue processing for approximately 1 minute. If the mixture is still too dry, add an additional pitted chopped date or two, one at a time, and process. Roll into 1 inch balls. Leave plain, roll in icing sugar or drizzle with frosting. These bliss bites are a tasty addition to any holiday treat tray and also make a fun gift. They keep for around a week in an airtight container in the fridge. If you are travelling with these, be sure to store them in a hard-sided container to avoid squishing. Savoury and sweet rolled into one sensational snack! 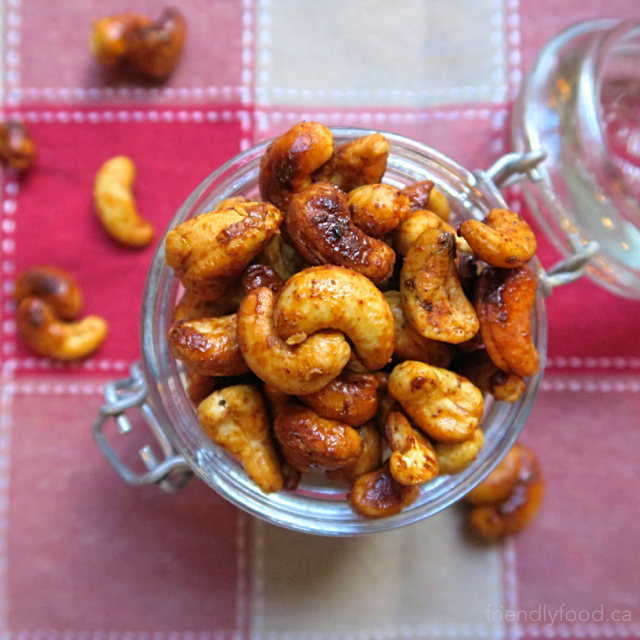 Prep & Cooking: 20 minutes Makes: approximately 4 cups Main Ingredients: 4 cups raw cashews – if you are using roasted nuts cut the roasting time in half (if needed check the label or ask the seller to find out if the nuts are roasted) 3 tbsp maple syrup 2 tbsp olive oil – if you are using roasted nuts cut the oil in half 2 tbsp lemon juice Seasonings/Spices: 1 ½ tsp salt 1 tsp chili powder 1 tsp cayenne pepper 1 tsp smoked paprika ¼ - ½ tsp chili flakes Method: Preheat oven to 350°F and line two baking sheets with parchment paper or tin foil. Place the cashews in a large bowl. In a small bowl, combine oil, maple syrup, lemon juice, salt, and spices. Whisk together and pour over the cashews. Stir gently to coat the cashews, taking care not to break them. Spread the nuts evenly in one layer on the prepared baking sheets. Bake for 15 -20 minutes, stirring halfway. The nuts will burn easily so watch them closely. As mentioned above, if the nuts are not raw, and have already been roasted, bake for 10 minutes, stirring hallway and watching closely. Allow the nuts to cool completely before storing for up to a week in an airtight container. These nuts make a tasty addition to any holiday table. A great snack with a holiday drink or a spicy surprise for a hostess or host. A simple yet decadent treat perfect for Holiday indulging!  Prep Time: 30 minutes Makes: approximately 20 cookies Main Ingredients: 1 package (approximately 300 grams or 20 cookies) of chocolate sandwich cookies, you know the kind; white creamy centre between two thin chocolate cookies *use a gluten-free variety if needed 250-300 grams dark or semi-sweet chocolate (not baker’s chocolate) – you can use a chopped bar of chocolate or chocolate chips, just look for the weight on the packaging Decorative sprinkles, chopped nuts, crushed candy cane etc. for topping Method: If using a bar of chocolate, chop it in to small pieces (see photo). In a double boiler, melt chocolate pieces or chips over medium-high heat until all pieces are melted and the chocolate is smooth. Alternatively, you can melt chocolate chips in a microwave safe bowl on medium-high for one minute and in 20 second intervals after that, stirring at each interval until the chips are melted and smooth. While the chocolate in still warm, using a fork or slotted spoon, dunk and coat each sandwich cookie. You may need to give each cookie a gentle shake to remove excess chocolate. After coating the cookie, place them onto a parchment or wax paper lined cutting board or on a cookie cooling rack with paper underneath to catch drips. Decorating small batches of 4-6 coated cookies at a time seems to work best and the decorations will adhere better to warm chocolate. Allow these coated and decorated cookies to cool at room temperature for 20-30 minutes before enjoying or packaging. Place parchment or wax paper in between cookies when packaging to ensure that the cookies won’t stick together and that your decorations will stay intact. Cooled cookies can be kept in the fridge, but they are best stored at room temperature to avoid any discolouration of the chocolate. Tips & Variations:
|

Archives
December 2020
Categories
All
|