|
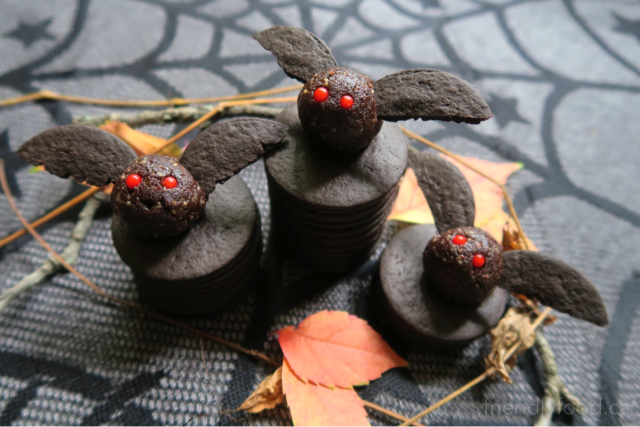
Get them while you can...they only come out at night! Prep & Cooking: 20 minutes Makes: 6-8 bats Main Ingredients: 1/3 cup nuts – pecans or walnuts work best, or use a combination of both 4-5 medjool dates, pitted and chopped 1 tsp vanilla extract pinch of salt 1 tbsp cocoa powder Small red candies, such as; pieces of jellybean or chopped cranberries to be used for bat eyes 10 chocolate cookies – cutting them can be tricky so having a few extras is a good idea *you can use plain chocolate wafer cookies or remove the cream from chocolate sandwich cookies. Sandwich cookies will likely be your best bet if you need or want a gluten free bat-wing option. Method: In a food processor, chop nuts until fine (see photo). Add dates, vanilla, and salt. Continue processing until all ingredients are incorporated. Add cocoa powder and continue processing until completely blended. Unplug your food processor and remove the mixture. The mixture should hold together easily when pinched, if not, continue processing for approximately 1-2 minutes; if mixture is still too try add an additional pitted chopped date and process. Roll into 1” balls and refrigerate for a few minutes while creating the chocolate cookie wings. Break cookies in half by hand or using a knife. You may wish to use the point of a knife to create rough edges on the wings. Using a toothpick, create two small holes in the chocolate ball to place the red candy or cranberry eyes. After the eyes are in place, again, using a toothpick, create two small slits in either side of the chocolate ball to hold the wings. This works best if the chocolate balls are chilled in the refrigerator for a few minutes beforehand. These bites make a cute addition to your Halloween snack tray or a spooky addition to a packed lunch. If you are making them ahead, store the chocolate balls in the refrigerator and add the eyes and wings before serving. If you are travelling with them be sure to store them in a hard-sided container to avoid squishing.
1 Comment
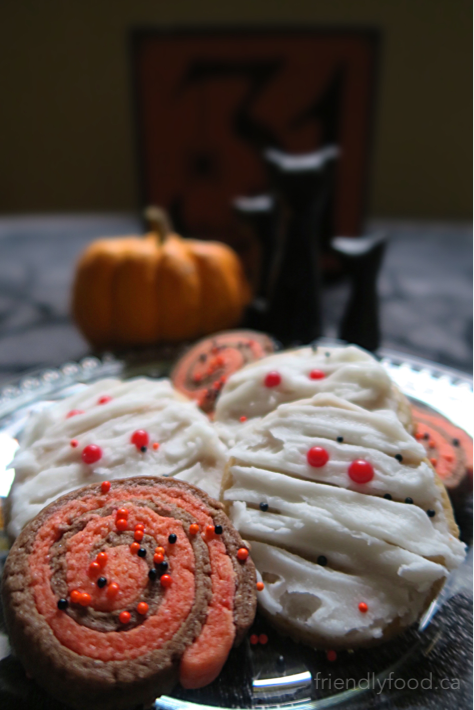
Nightmarish nibbles to please even your most ghoulish guests! Prep & Cooking: 1 hour (plus cooling and frosting time) Makes: 18-24 cookies depending on thickness Cookies Main Ingredients: 1 cup all purpose flour, or gluten free blend 1/3 cup sugar 1 tbsp maple syrup or agave nectar (optional) 1 tsp baking powder 2 tsp pumpkin pie spice (optional) 1/3 cup plant-based butter 2 tsp vanilla extract 1 tbsp plant-based milk Pinch of salt Yummy Mummies Cookie additions: Small red candies, such as; pieces of jellybean or chopped cranberries to be used for Mummy eyes Frosting – see recipes below Spooky Spiral Cookie additions: 1 tbsp cocoa powder A few drops of orange or combine red and yellow food colouring Halloween coloured sprinkles (optional) Method: Preheat oven to 350°F and line two baking sheets with parchment paper. In a large mixing bowl, combine dry ingredients. In a separate bowl, cream together butter, sugar, and vanilla. Add the dry ingredients to the sugar mixture and stir together until all ingredients are incorporated and there are no lumps. Separate the dough in half and one half again. You should have three pieces of dough, one larger than the other two. The two smaller pieces of dough will be tinted with cocoa powder and food colouring for a Halloween effect. Add the cocoa to one piece of dough and work through with a spoon or clean hands until a uniform dark brown colour is achieved. Do the same with the second small piece of dough and the food colouring to create an orange colour. The dough should be firm and easy to roll into three balls. Refrigerate the dough balls for 10-20 minutes while you make the frosting. (Cookie Method continued below) Frosting Main Ingredients: 1 cup powdered sugar 1 tbsp plant-based milk ½ tsp vanilla Method: In a bowl, blend together all ingredients until no lumps remain; using a fork can help to break up any lumps of powdered sugar. The frosting should be thick and spreadable. If it is too runny, add more sugar 1 tbsp at a time. These cookies are best frosted no more than a day before you plan to eat them. They can be stacked in a container after the icing has firmed up, but to be safe, place parchment or waxed paper in between layers of cookies. Cookie Method Continued: Remove the plain dough from the refrigerator and roll out on a floured surface to around a ¼ of an inch. Using a 2 inch cutter, a mason jar, or any other round cutter, cut around 10-12 circular cookies. Transfer to the prepared baking sheets and bake for 8-10 minutes. While the Yummy Mummies are baking get started on the Spooky Spirals. Roll each of the coloured dough balls out into a rectangle approximately ¼ inch thick. The rectangles should be about 4”x 8”. Place one rectangle on top of the other (see photos) and roll together tightly on the short side. When the spiral roll is complete, cut the dough log into ¼ inch slices using a sharp knife. This will create around 8-10 cookies. Top the cookies with coloured sugar or sprinkles if you choose and transfer the spiral cookies to the prepared cookie sheet to bake for 10-12 minutes. Transfer warm cookies to a cooling rack and allow to cool for about 10 minutes. When cookies are cooled completely frost the Yummy Mummies with the frosting recipe found above, or if you would prefer to use something you have purchased – go for it! Frost the cookies by evenly coating the cookies one at a time with a thin layer and allow frosting to set as you complete them one at a time. Beginning with the first frosted cookie, add additional icing, thicker this time, using a knife and spreading the frosting from side to side; the messier the better to create a bandaged effect. Place the red candies or cranberries on as eyes and give the cookies a few minutes to set. Tips & Variations:
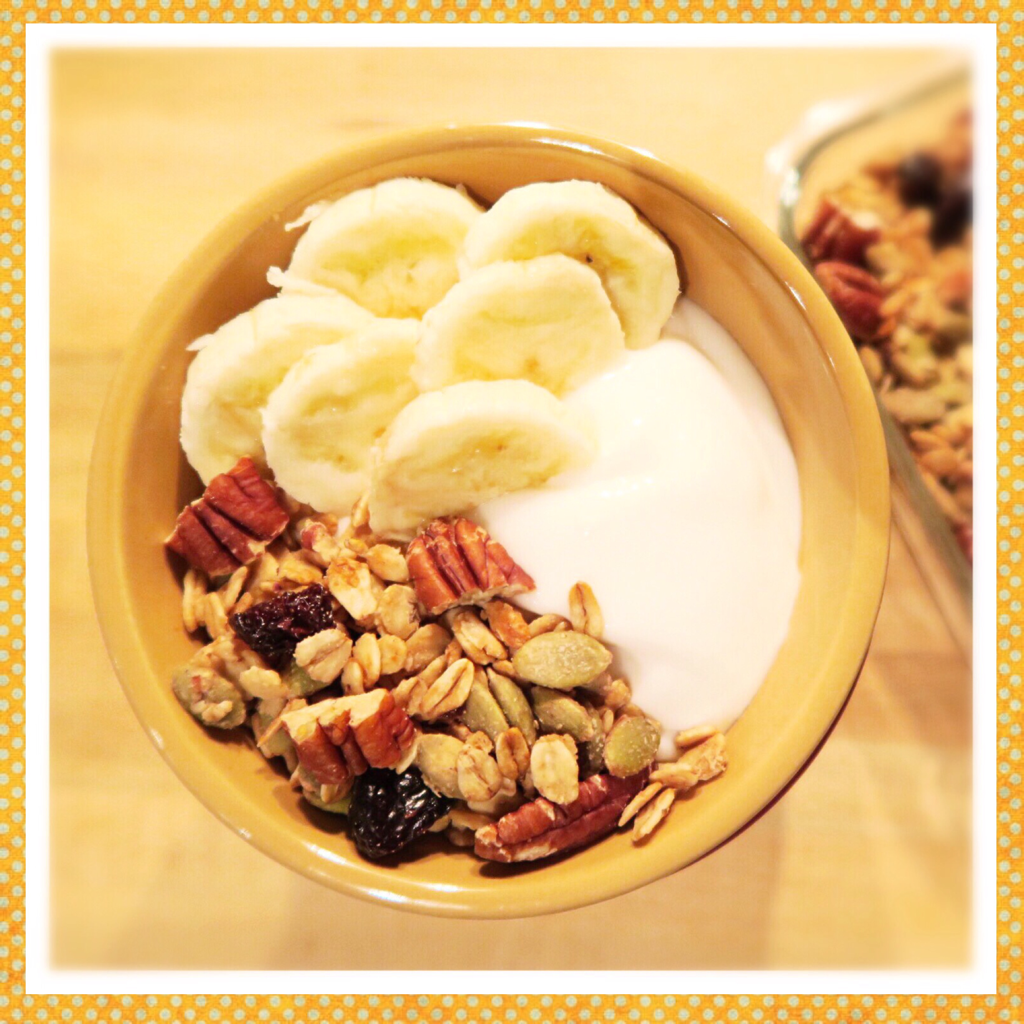
On its own or as a topping, this quick granola makes a delicious breakfast or snack Prep & Cooking: 20 mins Makes: 4-5 cups Main Ingredients: 2 ½ cups rolled oats (not quick oats) - use gluten free oats if needed ¼ cup + 1 tbsp melted coconut or vegetable oil 1 cup nuts – walnut or pecan pieces work best ¾ cup seeds – We suggest sunflower or shelled pumpkin (pepitas) seeds ¾ cup dried fruits – raisins, cranberries or cherries for example ½ cup maple syrup or agave nectar 1 tbsp vanilla 1 tsp ground cinnamon ¼ tsp ground ginger Pinch of salt ¼ cup shredded unsweetened coconut (optional) ¼ cup chocolate chips (optional) Method: In a large mixing bowl, combine maple syrup, coconut oil, vanilla, salt, cinnamon, and ginger. Mix the ingredients thoroughly with a whisk or fork. Add the oats, nuts, and seeds and stir to combine. In a large pan, preferably with high sides, warm the mixture over medium heat. If your pan isn’t large enough you can separate the mixture into as many batches as needed and cook them one batch at a time. Continue cooking the mixture on medium for 2-3 minutes, stirring regularly to avoid burning. Reduce the heat to low and continue cooking and stirring the mixture until it becomes toasted and brown, depending on your pan and stove-top this could take anywhere from 5-10 minutes. You should smell toasting and spiced smells, nothing burning. When the mixture is done, remove from heat and while still warm, stir in the dried fruit and optional coconut. This granola is best cooled if spread out. You can use cookie sheets or a large platter. If you are opting to add chocolate chips, wait until the mixture is completely cooled. As the granola cools it may clump together; break the pieces up with a wooden spoon or gently shake it in a lidded container. This granola keeps for several weeks in an airtight container; even longer if refrigerated. Tips & Variations:
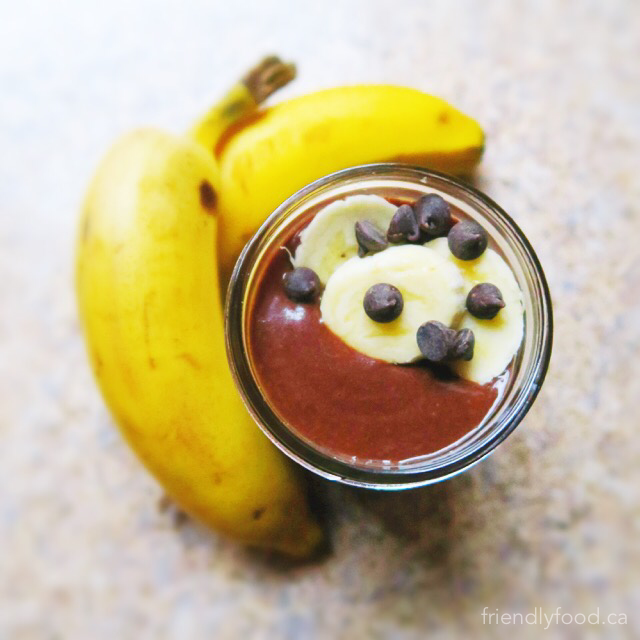
A simple, refreshing, & nourishing way to start the day! Prep: 10 minutes Serves: 1-2 Makes: Approximately 2 cups Main Ingredients: 1 cup plant milk 1 – 1.5 frozen or fresh bananas chopped, if you are using fresh you may wish to add a few ice cubes 2 tbsp cocoa powder 1 tbsp chia seeds 1 tbsp nut butter Optional Add-ins: 1 tbsp shelled hemp seeds (also called hemp hearts) 2 tsp ground flax 1 scoop protein powder Method: In a blender combine plant milk and chopped bananas, blend until smooth. Add cocoa powder & chia seeds and continue to blend. Because banana size varies you may need to add more if the mixture seems too liquid; do so half a frozen banana at a time. If you are making additions of your own or from the add-ins list, do so before adding additional banana. When your smoothie is well blended and a straw-drinking consistency, pour into glasses or jars and enjoy within 30 minutes. Tips & Variations:
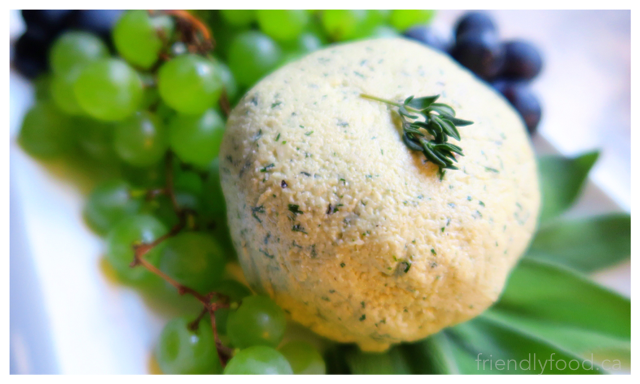
A make-ahead appetizer to cut cook and prep time on dinner day! Prep & Cooking: Soaking cashews for 4-24 hours and 10-20 minutes to combine ingredients and process Serves: 6-8 as an appetizer Pairs well with: Fall Menu Plan Main Ingredients: 1 cup raw cashews – you can use whole or pieces, whole cashews are easier to work with if soaked longer 2 cloves or 2-3 tsp crushed garlic 2 tbsp fresh sage 2 tbsp fresh thyme 3-4 tbsp fresh dill 1 tsp salt 1 tsp ground pepper Juice of half a lemon 2 tsp nutritional yeast (optional) Method: In a lidded container, soak 1 cup of raw cashews in water for a minimum of 4 hours, to a maximum of 24 hours. The longer you soak the cashews, the easier the nuts are to process and blend. If you will be using an older or low-power blender or food processor soak the nuts as long as possible. Drain the water and transfer the nuts to a blender or food processor. Add garlic, herbs, lemon juice, nutritional yeast, salt & pepper. Blend all ingredients until smooth. This will take awhile, up to 10-20 minutes depending on the power of your machine. You will need to stop the blender or processor several times to scrap the sides. Once you have reached a smooth consistency, transfer the nut cheese mixture to a lidded container and keep in the refrigerator until ready to eat. Serve with crackers, toast or flatbread and enjoy! Tips & Variations:
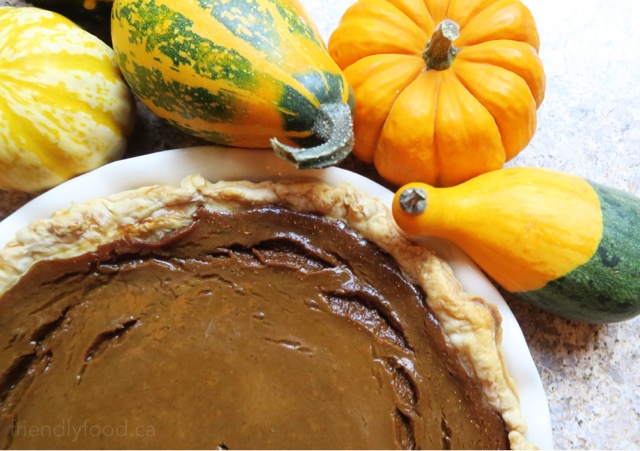
A tasty top-off to your holiday meal! Prep & Cooking: 1 hour 30 minutes + 30-60 minutes chilling time Makes: 1 deep dish or 2 standard 9” pies Pairs well with: Coconut Whipped Topping & Fall Menu Plan Pie Shell: If you can find and want to use a pre-made plant-based pie shell, go for it! Otherwise, find the ingredients below to make your own; 1 cup flour – I use all purpose, but use what you have or substitute a gluten free blend if needed ½ cup cold plant-based butter, shortening or very cold coconut oil ¼ cup of ice water Filling: 1 can (15 oz) pureed pumpkin or 2 cups cooked, pureed pumpkin ½ cup maple syrup or ½ cup sugar 1 (10-12/300-400g) package of silken tofu, drained 2 tbsp corn starch 1 tsp vanilla Spices: 1 tsp ground all spice ½ tsp ground ginger ½ tsp ground nutmeg 1 tsp ground cinnamon ¼ tsp ground cloves OR 2 tbsp of pre-blended pumpkin pie spice ¼ tsp salt Method: Preheat oven to 450°F. If you are creating your own pastry shell, follow the instructions below; In a large mixing bowl, combine flour and plant-based butter. Using a pastry cutter or 2 knives, or forks slice through the butter incorporating or “cutting” it into the flour. When the mixture is well blended and no large lumps remain, slowly add the water, a tablespoon or 2 at a time, and continue mixing until a dough forms and the mixture is no longer crumbly. Form the dough into a ball and wrap in a clean tea towel and refrigerate while you make your filling (see below). When you are ready, roll the dough out using a rolling pin on a floured surface. I suggest “blind baking” your pie shell, whether homemade or not, prior to pouring in the filling. This means pre-baking the crust for a short amount of time. I do this by pricking several holes in the bottom of the crust with a fork and baking for 10-12 minutes without any filling. You can also cover the pie shell in parchment paper and fill the cavity with pie weights or dry beans before blind baking to help the shell keep its shape; however this is not completely necessary. In a large mixing bowl, blend together all of the filling and spice ingredients listed above. Use an electric mixer, hand blender, or whisk to break up any tofu chunks. When all the ingredients are blended, and your mixture is smooth, pour the filling into the pie shell, and bake for 15 minutes. If you are using a premade pie shell choose a deep dish version. If you can’t find one or you have a small pie plate, you may be able to get two standard 9” pies from this filling. If you have extra filling left over, and only one pie shell or plate, you can also bake this filling in a baking dish sans shell or small individual oven safe cups; it just ends up more like a baked pumpkin custard. After 15 minutes, reduce the heat to 350°F and continue baking for an additional 45-60 minutes. Remove from the oven and test for doneness using a knife in the centre of the pie. When it comes out clean, it is baked through. Allow to cool for a minimum of 30 minutes before allowing to chill in the refrigerator for an additional minimum, 30 minutes. Serve on its own, or top with Coconut Whipped Topping. Tips & Variations:
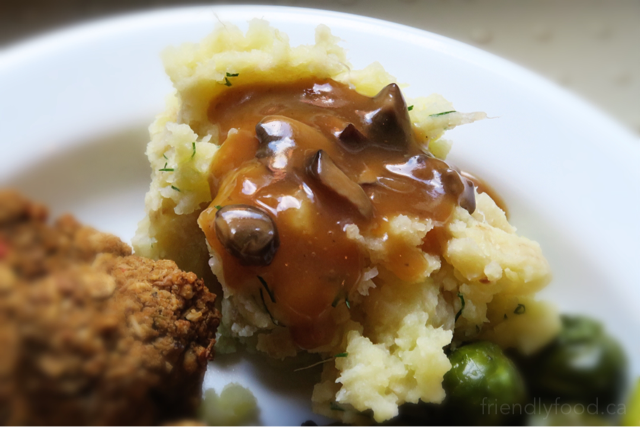
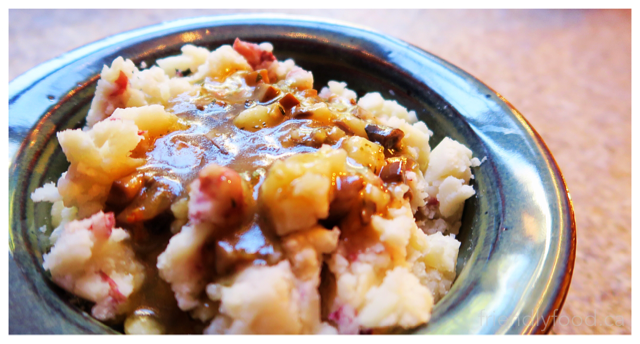
A creamy, rich and comforting addition to your Fall meal! Prep & Cooking: 20 minutes Serves: 6-8 Pairs well with: Fall Menu Plan Main Ingredients: 4 medium Yukon Gold potatoes 3-6 parsnips – size varies, in the end you should have roughly the same amount of parsnips and potato pieces 2-3 cloves crushed fresh garlic or 2-3 tsp of garlic powder Salt and pepper to taste 1 tbsp fresh or 1 tsp dried parsley 1 tbsp fresh dill or 1 tsp dried dill 1-2 tbsp plant-based butter (optional) Method: Clean and pat dry the potatoes and parsnips. It is not necessary to peel either vegetable, unless you really want to. Chop potatoes into approximately 1” dice and place in a large pot. Chop the parsnips into smaller pieces, around half the size of the potatoes. Parsnips will take a little bit longer to cook, cut them smaller than the potatoes and they will be done at the same time. Add the chopped parsnips to pot with the potatoes and fill with water to cover the veggies. Over medium-high heat, bring the water to a boil and lower temperature to medium. Cover the pot and allow to simmer for 8-10 minutes. Check the potatoes and parsnips by piercing the largest pieces with a sharp knife. When a knife easily cuts the vegetables, remove from heat and drain the water. Mash the potatoes and parsnips together in the pot and add garlic, salt and pepper, parsley, dill, and plant-based butter. Stir to combine and enjoy! Tips & Variations:
A rich and savoury compliment to your holiday menu Prep & Cooking: 10 minutes Serves: 6-8 Pairs well with: Fall Menu Plan Main Ingredients: 3 tbsp plant-based butter or olive oil 2 cloves garlic, minced 1/8 cup finely chopped onion 1 cup cremini mushrooms, chopped 2 tbsp corn starch or flour 2 cups vegetable broth or use stock cubes, just follow the instructions to create 2 cups of stock 1 tbsp tamari or soy sauce (optional) Seasonings: 1 tsp fresh thyme or ½ tsp dried thyme 1 tsp fresh sage or ½ tsp dried sage 1 tsp fresh rosemary or ½ tsp dried rosemary – chop the rosemary leaves into small pieces to avoid a “chewy” gravy salt & pepper to taste Method: In a medium saucepan over medium heat, melt plant-based butter. Reduce heat to low and add garlic and onion; sautéing for a few minutes until the onion is soft. Be sure to watch the heat and reduce if the garlic is starting to brown. Add chopped mushrooms and continue to sauté over low heat, allowing the mushrooms some time to cook. Stir occasionally to avoid burning or sticking. While the mushrooms are cooking, combine the corn starch with 2-3 tablespoons of broth and whisk together. If you skip this step and add the corn starch directly to the gravy at the end, the corn starch will stay lumpy and your gravy won’t be smooth. Set the corn starch and broth mixture aside and add remaining stock to the saucepan. Use a wooden spoon to scrap the bottom of the pan and remove any bits that may have stuck to the bottom; the broth will help loosen them. Add the corn starch and broth mixture slowly, and whisk to incorporate. After the all ingredients are combined, turn the heat up to medium and bring the gravy to a boil; allow the mixture to gently boil for 1-2 minutes and reduce heat to low. The gravy will start to thicken. Continue to stir to avoid burning and whisk again if needed. After gravy has thickened, add salt and pepper and give it a taste. If you would like to add the tamari or soy sauce for an additional richness, add that now. This gravy keeps well in a lidded container, in the refrigerator for up to a week. Tips & Variations:
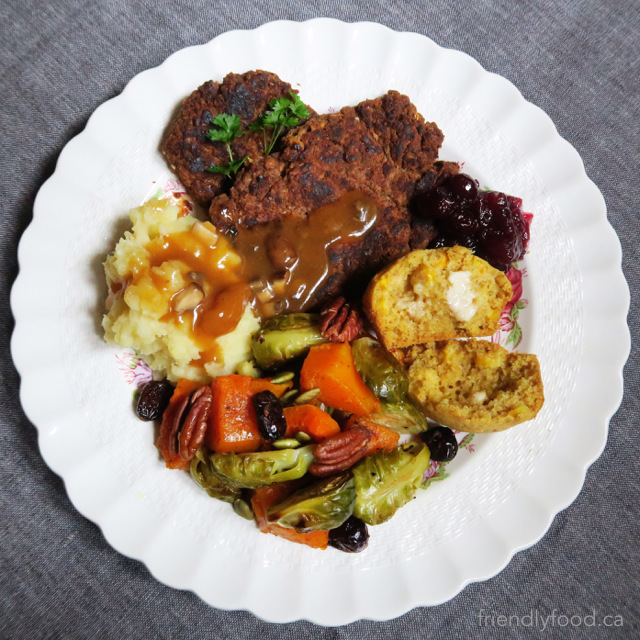
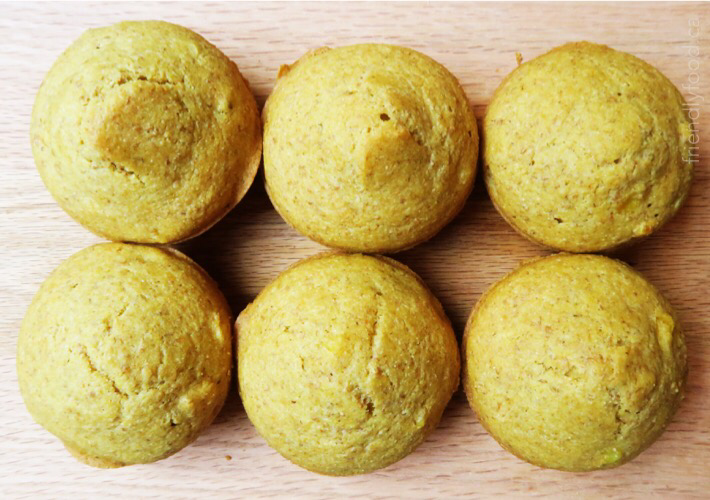
A herbed, hearty and simple addition to any Thanksgiving plate! Prep & Cooking: 20-30 minutes (depending on the size of your food processor) Makes: 8-10 patties or around 30 balls Pairs well with: Fall Menu Plan Main Ingredients: 1 can (540ml/19 fl oz.) lentils or 2 cups cooked lentils 1 can (540ml/19 fl oz.) white beans or 2 cups cooked beans 1 medium onion, chopped 2 ribs of celery, chopped 1 ½ cups rolled oats, divided into 1 cup and ½ cup amounts ½ cup walnuts 2 tbsp tomato paste 1 tbsp olive oil ¼ cup chopped red pepper (optional) Seasonings/Spices: 1 tsp salt 1 tsp ground pepper 1 tsp parsley 1 tsp sage 1 tsp rosemary *you can also use 3-4 tsp poultry seasoning, this blend easily available and contains a number of classic thanksgiving flavours and no poultry) ½ - 1 tsp dry mustard, or 1 tsp Dijon mustard (optional) 3-10 drops liquid smoke (optional) Method: In a food processor or blender, combine walnuts and 1 cup of oats. Use a pulse function if your machine has it to break down the nuts and oats until a crumbly mixture similar to bread crumbs forms. Remove this mixture from the processor, and set aside. Combine all remaining ingredients in your blender or processor, except the remaining ½ cup of oats and blend until smooth. Depending on the size and power of your blender or processor you may need to do this in batches; don’t worry about evenly distributing the ingredients while you do this as it will all be mixed together at the end. A few lumps or pieces of celery, onion, or bean may remain and that’s ok. Remove the bean and lentil mixture from your blender or processor and in a large mixing bowl add the nut and oat mixture along with the remaining ½ cup of unprocessed rolled oats. Stir to combine. Line a cutting board, plate, or baking sheet with parchment or waxed paper. Form lentil and bean mixture into patties in whatever shape you like; try to keep them around 1/2” thick. Alternatively, you can roll the mixture into balls, keeping them around 1- 1 ½”. Stove Top: Over medium heat in a large large skillet, warm 1 tbsp of oil and place patties or balls in pan and cook 3-5 minutes per side. Patties and balls should be crispy outside and warmed through. Oven: Preheat oven to 400°F and line a baking sheet or shallow baking dish with parchment paper. Bake for 20-30 minutes, turning once midway through. Serve these patties with your favourite Holiday side dishes. If you have any left, use these in a traditional "Thanksgiving leftovers" sandwich! A sunny yellow side or snack Prep & Cooking: 30 minutes Makes: 12 muffins or 1 – 9x9 pan Pairs well with: Fall Menu Plan Main Ingredients: 1 cup whole wheat flour – use a gluten free blend if needed 1 cup cornmeal ½ cup plant milk ¼ cup vegetable oil ½ tsp salt ¼ cup frozen or fresh corn kernels 2 tsp baking soda 2 tsp baking powder 4-5 tbsp maple syrup 1 jalapeño or chili pepper, chopped finely (optional) Method: Preheat oven to 400°F and prepare muffin tin or 9x9 pan. In a large mixing bowl, combine all ingredients except corn kernels and optional pepper. Stir to combine and when no lumps remain fold in corn and chopped peppers. Spoon the batter into prepared muffin tins, filling them about halfway. Bake for 15-20 minutes. Use a toothpick or clean knife to test the centre of a muffin from the middle of the tray. When the toothpick or knife comes out clean, the muffins are done. These muffins keep well in an airtight container for about a week or in the freezer for up to 1 month. |
Archives
December 2020
Categories
All
|
