|
This is a quick and tasty way to enjoy pantry staples and seasonal ingredients! 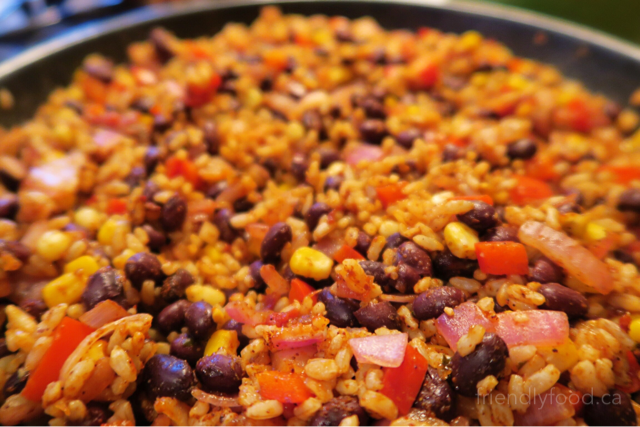 Prep & Cooking Time: 20 mins (+initial cooking time for rice) Serves: 6-8 Main Ingredients: 1 cup dry brown rice cooked and cooled (this makes around 2 ½ cups cooked) 1 small red onion 1 large bell pepper diced ½ cup (or more) frozen or fresh corn kernals 1 can of black beans drained and rinsed Seasoning: 1 tbsp (or more) chili powder 1 tsp cumin Pinch of cayenne 1 tsp onion powder 1-2 tsp garlic powder (or 2 -3 fresh garlic cloves minced) Salt and pepper to taste 1/3 cup salsa Method: In a high sided, non-stick pan over medium heat sauté red onion until soft, around 2-3 minutes. Add cold rice, using the back of a wooden spoon to break it up if clumpy. Continue by adding the bell pepper, corn and beans and stir to combine. After peppers are soft and corn is thawed add the seasoning ingredients listed above. Stir to combine. Serve on its own or use one of the suggestions below. This rice dish can be stored in the refrigerator, in an air tight container, for up to one week. Tips & Variations:
2 Comments
Chocolate & vegetables together...the future is now! 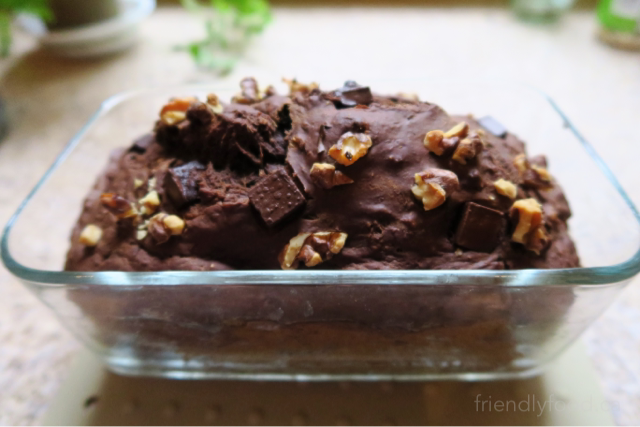 Prep & Baking: 15 minutes prep, 50 – 60 mins to bake Serves: 10 -12 slices or 12 muffins (20-25 mins to bake) Main Ingredients: 1 ½ cups whole wheat flour, or gluten free option if you prefer 1/3 cup cocoa powder 1 tsp cinnamon 1 tsp baking soda 1 tsp baking powder ½ tsp salt 3 medium ripe bananas – I freeze my bananas and quickly microwave them before use, see our Peach Crumble-Top Muffin recipe for tips on using frozen bananas in baking 1 ½ cups shredded zucchini – you can use a box grater for this or a food processor ¼ cup vegetable or melted coconut oil ¼ cup coconut sugar 2 tsp vanilla 1/3-1/2 cup chocolate chips, pieces or chunks ¼ - 1/3 cup chopped walnuts (optional) Method: Pre-heat oven to 350°F and prepare your loaf pan by ‘greasing’ it with plant-based butter or coconut oil if needed. If you are choosing to make this recipe into muffins, prepare your pan or get your paper liners in position. In a large bowl, combine oil, sugar, vanilla, bananas, and shredded zucchini. Stir to combine and use the back of your mixing spoon to break up the bananas until the mixture is smooth with few to no lumps. If your bananas are still firm you may wish to use a fork or a whisk to mash them. In a separate bowl, combine flour, cinnamon, baking soda, baking powder, and salt. After the dry ingredients are mixed, add them to the wet ingredients and stir to combine. The consistency of the batter will depend on the moisture content of your bananas and zucchini. If the batter seems a little dry, add a few tablespoons of water at a time and stir to combine. Add chocolate chips and walnuts to the batter and gently fold until incorporated. Fill your loaf pan and pat the batter down with a spoon or rubber spatula to pop any air bubbles. If you are opting for muffins, fill each of your prepared muffin cups around ¾ of the way full. Whether you are making a loaf or muffins, you can sprinkle with chopped walnuts and chocolate chips for a finishing touch. Bake at 350°F for 50-60 minutes for a loaf, or 20-25 minutes for muffins. Use a toothpick or knife to test the centre of the loaf or muffins, when it comes out clean they are done. Allow to cool for around 10-15 minutes before removing from the pan. Tips & Variations:
Quick, simple, and packed with greens! 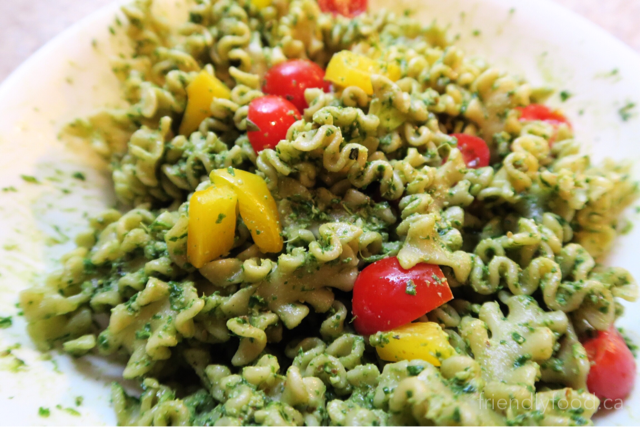 Prep & Cooking: 5 minutes, plus pasta cooking time Makes: approximtaely ½ cup, serves 2 Main Ingredients: 1 cup, firmly packed, fresh spinach 1 tbsp extra virgin olive oil 1 tbsp nutritional yeast – this adds a “cheesy” flavour 1½ tsp fresh chopped garlic or 1 large clove ¼ cup raw walnuts 1 tbsp lemon juice Salt and pepper to taste Method: In a food processor or blender, combine all ingredients and process until smooth. We used a mini food processor and it was large enough to make one batch. If you have a small, single serve blender or small processor and want to double the recipe, make it one batch at time in order to achieve desired creamy consistency. Toss the pesto with warm pasta and top with additional nutritional yeast if desired. The addition of vibrant veggies like tomatoes and peppers offer extra colour, flavour and texture. Choose a textured pasta; penne, fusilli and rigatoni are all good options. The textured pasta will help grab the sauce and hold on tight. As always, this is a suggestion, use what you have or what is available. This sauce keeps in an airtight container, in the refrigerator for up to a week, if it lasts that long! Tips & Variations:
A sweet, savoury & spicy tropically inspired treat! 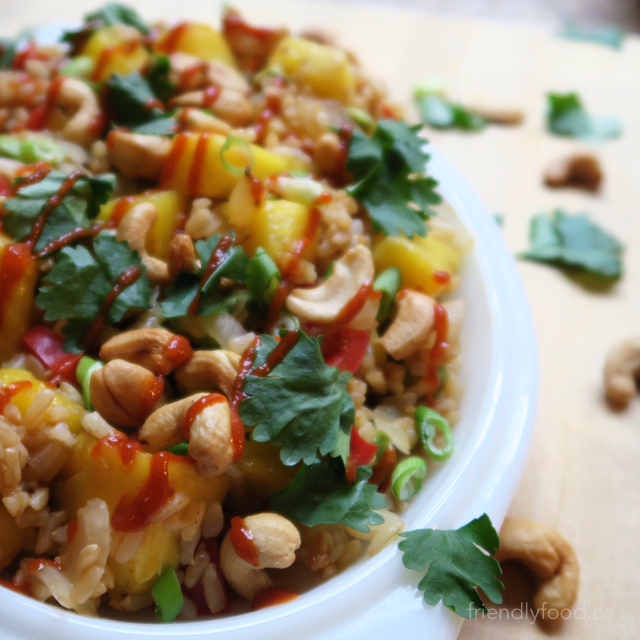 Prep & Cooking: 25 minutes (with cooked and cooled rice) Serves: 4-6 Main Ingredients: 3 cups brown rice cooked and cooled – if you don’t have or like brown rice, use what you have or prefer 1 cup fresh pineapple, diced – if you prefer, or for convenience you can use canned pineapple, but be sure to drain the juice ¾ cup shelled edamame (soybeans) – frozen is just fine, if edamame is not available you can substitute ¾ cup fresh or frozen peas 1 small onion, chopped 1 medium-large red bell pepper, diced 2 green onions, chopped ½ cup or more roasted, salted cashew nuts Sauce: 4 tbsp tamari or soy sauce 1 tbsp hot sauce such as sriracha – if you want to tone down the heat you can omit or decrease the amount of hot sauce 1 tbsp lime juice – lemon also works as a substitute 1 tsp fresh grated ginger root OR 1 ½ dried, ground ginger 1 ½ - 2 tsp fresh garlic, minced OR 1 tsp garlic powder Optional Garnish: 1-2 green onions chopped Chopped cilantro Method: In a large non-stick pan, over medium heat, sauté onion until soft, approximately 2-3 minutes, add a tablespoon of water if your onions begin to stick to the pan. Reduce heat to medium-low and add bell pepper and edamame, if using frozen edamame cook until beans are heated through, otherwise sauté ingredients, stirring occasionally, for approximately 5 minutes until the peppers are soft. You can make the sauce now, while the peppers and edamame are cooking, or wait until the rice portion of the dish is complete – do what you are comfortable with. To prepare the sauce, you will need either a small bowl and a whisk or fork, or a jar with a secure, tight lid. Into your container of choice pour tamari, hot sauce and lime juice and add ginger and garlic. Whisk together or shake a lidded container until all ingredients are incorporated. Add cooked and cooled rice and stir to combine with the vegetable and beans. When rice is combined add pineapple and green onion, continue to heat on medium-low for 5-7 minutes, stirring occasionally to avoid burning (especially the pineapple), until rice is heated through. Optional: In a small, dry pan over low heat toast the cashews until just browned. Remove from heat, add cashews to the rice, and pour the prepared sauce over the warm rice, stirring to coat. Top with green onion, cilantro and/or additional cashews. Tips & Variations:
Bright tropical flavours rolled together into the perfect bite-sized snack! 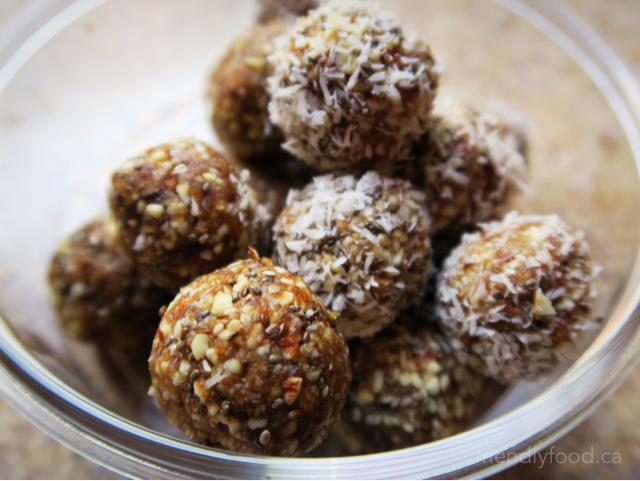 Prep Time: 20 minutes (if using fresh dates) Makes: Approximately 15 pieces Main Ingredients: ¾ cup raw almonds 6-8 Medjool dates, pitted and quartered (see photo below) – I use medjool because they tend to stay fresh and are easily blended as are most fresh dates, if fresh dates aren’t available or you have dried dates on hand, soak them for about 30 minutes in hot water before continuing with the recipe 2 tbsp unsweetened shredded coconut – I prefer unsweetened, but use what you have if it’s sweetened, flaked etc. 1 tsp vanilla 1 tbsp chia seeds (optional) 1 ½ tbsp orange zest OR 2 tsp orange oil or extract – this can usually be found in the baking section of your grocery or health food store near the vanilla Toppings: 2 tbsp unsweetened shredded coconut 2 tbsp finely chopped almonds – do this by hand or add an additional 10 or so almonds to the initial ¾ cup and measure out 2 tbsp before adding the dates to the processor Method: In a food processor, chop almonds until fine (see photo below). Add dates, coconut, vanilla and orange zest or extract. Continue processing until all ingredients are incorporated, often the ingredients will come together and form a ball in the processor. Unplug your food processor and remove the mixture. The mixture should hold together easily when pinched, if not, continue processing for approximately 1 minute. If the mixture is still too dry, add an additional pitted chopped date or two, one at a time, and process. Roll into 1” balls, leave plain or roll in chopped almonds or coconut. These bites make a great on-the-go snack or a great addition to a packed lunch. They keep for around a week in an airtight container in the fridge. If you are travelling with these, be sure to store them in a hard-sided container to avoid squishing. Tips & Variations:
A classic compliment to a cup of tea, or on its own as a snack - mix and match with jam or a sweet glaze  Prep & Baking Time: 35 mins Makes: 16 mini or 8-10 large scones Pairs well with: Chia Seed Jam Main Ingredients: 1 cup whole wheat flour 1 cup all purpose flour – or gluten free blend of your choice totaling 2 cups ½ cup coconut sugar – or a granulated sweetener of your choice 2 tsp baking powder ½ tsp salt 1 tsp cinnamon ½ cup chilled plant-based butter 2/3 cups of unsweetened plant milk – almond, coconut, or soy all work well, but use what you have 2/3 cup berries – use any combination of berries or small cut fruit that you like Zest of one lemon Optional Topping: 2 tbsp melted plant-based butter OR melted coconut oil 1 tbsp coarse sugar ¼ cup chopped nuts Sweet glaze - see tips & variations below for instructions Method: Preheat oven to 400°F and cut a piece of wax or parchment paper large enough to contain a 10”x10” square of dough. In addition, line two baking sheets with parchment paper. In a large mixing bowl whisk together; flour, sugar, baking powder, salt and cinnamon. Add vegan butter to the dry mixture and slice through with a pastry cutter to incorporate. If you do not have a pastry cutter, use two butter knives to slice through and mix the butter into the dry ingredients, it may seem like it will never happen, but it will come together! Be patient, you will need to “cut” the butter into the flour mix in order to gain the consistency of wet sand, after the butter is worked in (no more lumps) the mixture should just barely hold together when pinched. Add milk and lemon zest, stirring to combine. The mixture should come together and be tacky to the touch, if it seems too dry and crumbly, add additional milk, 1 tbsp at a time. Add fruit and gently fold the dough to incorporate it. Form the dough into a ball shape, removing any extra dough from the sides of the bowl with a scraper. Dust your parchment with flour and transfer the dough ball onto the paper. Pat the dough out into a flat square shape, approximately 10”x10”. Using a large sharp knife, cut the dough square into quarters, cut each quarter into 4 triangles by creating an “X” in each quadrants (see photos below for cutting options). This will create 16 mini scones. Using a flipper or spatula transfer each scone to a parchment lined baking sheet. Brush with melted vegan butter and sprinkle with coarse sugar. Bake at 400°F for 15-20 minutes until edges are golden and crisp. Remove from baking sheets and allow scones to cool for at least 10 minutes before enjoying. Use the glaze recipe below for added sweetness and sprinkle with chopped nuts if desired. These scones can be stored in an airtight container for up to a week, be sure to cool completely before storing. Tips & Variations:
|

Archives
December 2020
Categories
All
|