|
A refreshing "Gem" of a salad for warm Summer days! 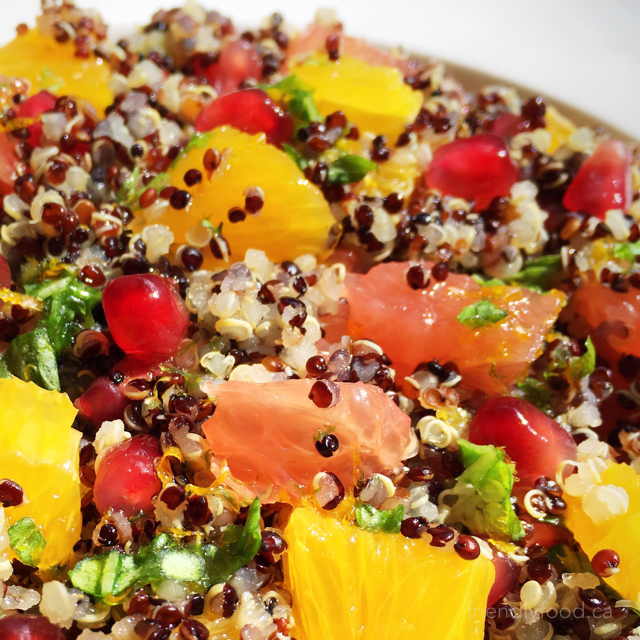 Prep & Cooking: 45-60 mins (includes cooling time) Serves: 6-8 as a side dish, 3-4 as a main Main Ingredients: ¾ cup dry quinoa (this makes approximately 3 cups when cooked) 1 ½ cups water 1 large grapefruit, peeled, segmented and diced 1 large orange, peeled, segmented and diced– be sure zest your orange prior to cutting for the dressing ½ - ¾ cup pomegranate arils (seeds) Dressing: 1/3 cup agave nectar – or light liquid sweetener of your choice 1 tbsp each of lime and orange zest 2 tbsp each lime and orange juice 2-4 tbsp chopped fresh mint Pinch of salt Optional Garnish: 1 tbsp chopped fresh mint or whole mint leaves Method: Using a sieve, rinse the quinoa until water runs clear, this should take less than 1 minute. In a large pot, bring quinoa and water to a boil and reduce to low, covering and simmering for 15-20 minutes. As the photo below shows, the quinoa changes shape and expands significantly. All of the water should be absorbed and the quinoa should be soft enough to bite through with no crunch. Remove the quinoa from the pot and transfer to a shallow bowl to cool for a minimum of 20 minutes, the thinner you can spread the quinoa out, the faster it will cool. While the quinoa is cooking, zest the orange and lime. To zest a citrus fruit means to remove a thin layer of the outer skin, this layer contains fragrant and flavourful oil and can be removed with a tool called a rasp, similar to a very fine grater. If you do not have a rasp you can carefully remove a thin layer of outer skin with a box grater or sharp knife, being carefully to not include too much of the white layer beneath the coloured skin, the white layer is called the pith and can be bitter. If you are removing the skin with a knife or grater chop it finely before adding it to the dressing. Remove the skin from the grapefruit and orange, I find it easiest to cut it away rather than peel, slice the fruit and dice into small pieces. See included photo of an orange in the process of segmented. You will notice after the peel is removed that there are thin white lines between each segment of fruit, cut on the inside of these lines to avoid the tougher skin in between the segments. You will require 2 tbsp of orange juice for the dressing, these should be enough juice left in the remaining orange after segmenting for this purpose. If you are using a whole pomegranate rather than packaged arils, I suggest removing the seeds from the fruit under water, don’t worry – no snorkel required. Cut the fruit in quarters (be careful! The juice stains!) and submerge the sections into a bowl of water. As best you can attempt to turn the sections inside out or simply break the pockets of seeds away from the skin. The seeds, or arils, will be released and sink to the bottom, while any of the white membrane holding the arils inside of the pomegranate float to the top and can be easily separated. If you are able to find the arils already prepared, you can use those too. To prepare the dressing, you will need either a small bowl and a whisk or fork, or a jar with a secure, tight lid. Into your container of choice pour agave, lime juice, orange juice, zest and salt. Whisk together or shake a lidded container until all ingredients are incorporated. If the dressing seems too thick, add more fruit juice, too thin, add a touch more agave. After your dressing is the desired consistency, add the chopped fresh mint and whisk or shake to combine. In a large bowl add quinoa, pomegranate arils along with orange and grapefruit pieces and stir to combine. Drizzle with dressing and gently toss to incorporate. Garnish with additional chopped mint or whole mint leaves. Tips & Variations:
0 Comments
A Summertime fruit-filled breakfast, or on-the-go snack! 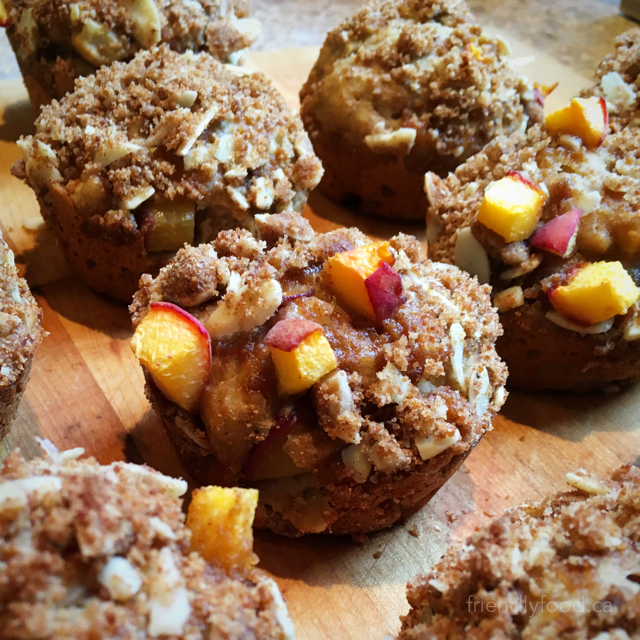 Prep & Baking: 30-35 minutes Makes: 12 muffins Main Ingredients: Muffin Batter: 1 cup whole wheat flour ½ cup all purpose flour – use just one type of flour or a gluten free option if you prefer 2 tsp cinnamon 1 tsp baking soda 1 tsp baking powder ½ tsp salt 3 medium ripe bananas – I freeze my bananas and quickly microwave them before use, see below for more tips ¼ cup vegetable oil ¼ cup coconut sugar 1 ¼ cup diced peaches ¼ cup flaked almonds Crumble Topping: ¼ cup all purpose flour – or flour of your choice 1/3 cup coconut sugar 2 tbsp melted plant-based butter ¼ cup flaked almonds 1 tsp powdered ginger (optional) Method: Pre-heat oven to 400°F and prepare a muffin tin. If your muffin tin requires “greasing”, with plant-based butter or coconut oil, now is the time. If you opt for paper liners they can be placed in now so that they are ready to go. Banana Tip: I use frozen bananas. Freezing ripe bananas is a great way to avoid waste and to have a stash of fruit ready for baking. I remove the banana stem prior to thawing, this creates a nice little opening for the ripe and often very soft fruit to travel through. I then place the bananas, peel on, flat on a plate and microwave them for 1-2 minutes, usually checking every 30 seconds after the first minute. By removing the stem prior to thawing, you will also avoid any bits of burnt banana peel (not a pleasant smell). When the bananas are thawed they can be easily squeezed from their peel right into your mixing bowl. If you have high-powered microwave you may wish to use a low or medium power setting or use the defrost feature instead, this may add a few minutes. In a large bowl combine oil, sugar, and bananas. Stir to combine and use the back of your mixing spoon to break up the bananas until the mixture is smooth with few to no lumps. If your bananas are still firm you may wish to use a fork or a whisk to mash them. In a separate bowl, combine flour, cinnamon, baking soda, baking powder, and salt. After the dry ingredients are mixed, add them to the wet ingredients and stir to combine. Add flaked almonds and diced peaches to the batter and gently fold the batter until incorporated. In an additional small bowl, add all of the crumble topping ingredients and stir until combined. Some of the flaked almonds will break and that’s ok. Fill each of your prepared muffin cups around ¾ of the way full and top with the crumble mixture and bake for 20-25 minutes. Tips & Variations:
Add a touch of ruby sweetness to your sunny-day drinks with this effortless syrup 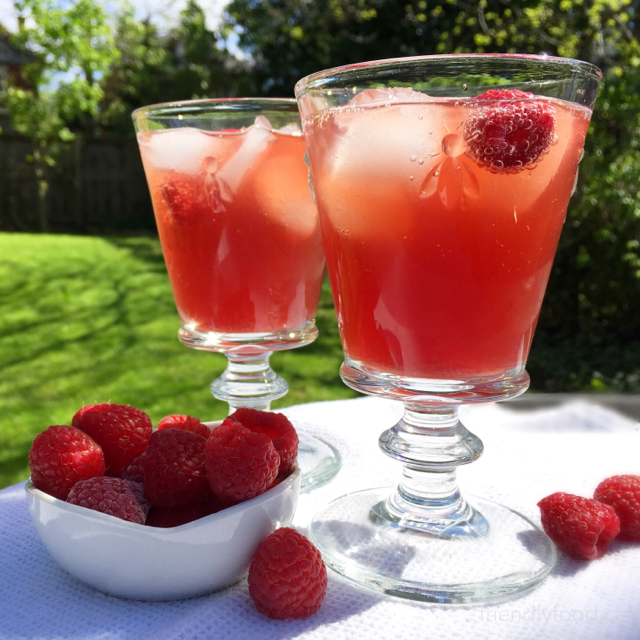 Prep & Cooking: 25 minutes (plus cooling time) Makes: 1 cup of syrup *Does one cup of sugar sound a bit over the top? It certainly does to me at first glance. But, consider this; the recipe can create up to 16 individual servings, that means just over 3.75 liters of homemade raspberry-lemon "soda". Remember, if you have a sugar stand-in that you swear by, give it a try! Main Ingredients: 1 ½ cups fresh or frozen raspberries 1 cup sugar ½ cup water 1 tbsp lemon juice 1 tbsp lemon zest Method: In a medium sized pot over medium heat, combine all ingredients except the lemon zest, stirring to dissolve the sugar. Bring mixture to a boil, then reduce heat and allow to simmer for 15 minutes, stirring occasionally to encourage berries to breakdown and to avoid burning. You may need to use the back of a wooden spoon to crush berries that remain whole. Remove from heat and add lemon zest, allow to infuse for 3-5 minutes, stirring occasionally. Using a fine mesh sieve, strain the berry, lemon and sugar mixture, pushing the liquid through the remaining seeds with a rubber spatula or back of a wooden spoon, and into a heat proof glass jar or container. Allow to cool completely before refrigerating. Add 1-2 tablespoons of syrup to a glass filled with ice, top with 1 cup (250ml) of soda or tonic and stir. Tips & Variations:
A little planning ahead goes a long way in making a batch of this delightful dessert topping! 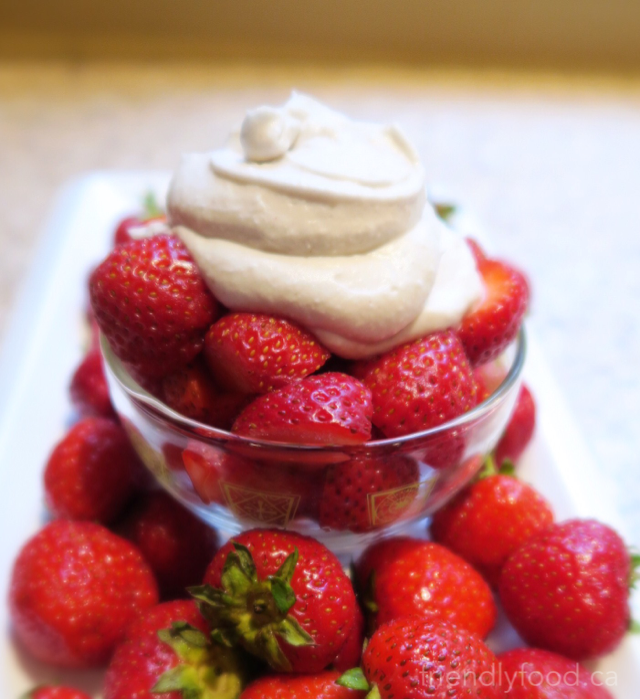 Prep: 5 minutes + overnight chill time for a can of coconut milk Makes: 1 ½ cups Pairs well with: Apple & Summer Berry Crumble Main Ingredients: 1-400ml (14 oz.) can of full-fat coconut milk 1-1.5 tbsp maple syrup or agave nectar – start with 1 tbsp and add more if you would like a sweeter whipped topping 1tsp vanilla extract Pinch of cinnamon Method: Place a can of full-fat coconut milk in your refrigerator overnight or longer, upside down. The fat of the coconut, or coconut cream, will separate from the coconut water as the can chills. The cream is significantly heavier and as a result will settle at the bottom. By turning the can upside down the cream with be at the top of the can when you turn it right-side-up to open it. After the can of coconut milk has been thoroughly chilled (overnight or longer), remove the lid and, using a spoon, remove only the coconut cream. Leave the cloudy coconut water behind, and transfer the spoonfuls of coconut cream to a medium sized mixing bowl. Using an electric beater on medium-high, whip the coconut cream, maple syrup, vanilla, and cinnamon together for approximately 1-2 minutes. Your whipped topping may not be a bright white like commercial whipped topping as you’ve added maple syrup, possibly caramel coloured vanilla, and cinnamon. The mixture should be firm enough to spoon over fruit or other desserts and not runny. If you won’t be enjoying this topping right away, be sure to refrigerate it as it is temperature sensitive and will become runny quickly. This can be stored in a sealed container in the refrigerator, but should be used the same day or as soon after being made as possible. Tips & Variations:
A classic heart-warming dessert sure to please just about everyone! 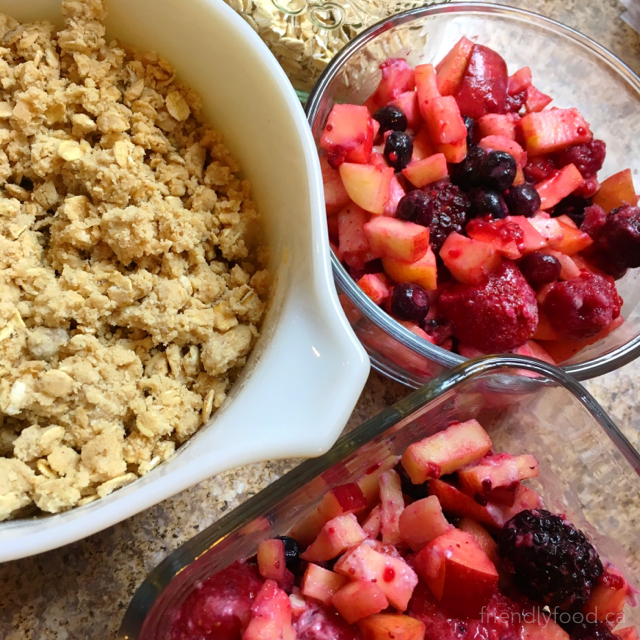 Prep & Cooking: 45-60 mins. Serves: 6-8 Pairs well with: Coconut Whipped Topping Main Ingredients: 3 medium sized apples – I don’t peel my apples, but if you prefer, you can 2 ½ cups fresh or frozen berries of your choice – I used a mix of strawberries, blueberries & blackberries 1 ½ tbsp flour – use what you have; gluten free blend, whole wheat or all purpose Crumb Topping: 1/4 - 1/2 cup brown sugar or coconut sugar ½ cup plant-based butter ¾ cup flour of your choice ¾ cup rolled oats 1/3 cup walnuts chopped (optional) Seasonings/Spices: 2 tsp cinnamon 1 tsp salt Method: Preheat oven to 400°F. In a large mixing bowl, cream together sugar and butter. Add salt, cinnamon, flour, oats and chopped nuts, stir to combine. You may find it easier to work the ingredients together by hand or with a fork to ensure that the oats are evenly distributed. Set this mixture aside while you prepare the fruit. If you are using frozen fruit, allow it to sit out for 10-15 minutes or thaw it in the microwave for 30-45 seconds, this will help to release some of the fruit’s juices which will help with combining flour with the fruit. If you are using fresh berries you may wish to mash a few pieces with the back of a fork in order to create some juice. In a large bowl combine apples, berries and 1 ½ tbsp flour, stir until all of the fruit has been coated. This will thicken any fruit juice and will create a less liquid finished product. Transfer fruit mixture to a 9x9 baking dish. If you do not have a 9x9 baking dish use an oven safe container that will hold the fruit, creating approximately a 1 ½ - 2 inch layer of fruit. You can also use multiple smaller containers, baking times will vary, but not enough to worry about. As you can see in the photos for this recipe I used a loaf sized pan and a small circular dish. Layer the crumb topping evenly over the fruit mixture and place on the middle rack of a preheated oven. Bake uncovered for 20-25 minutes. When finished the topping should be golden and the fruit mixture will be bubbling. Allow the crumble to cool for 15 minutes or more before serving. Tips & Variations:
Flavourful and crunchy enough to enjoy on their own & a terrific accompaniment to a dip! 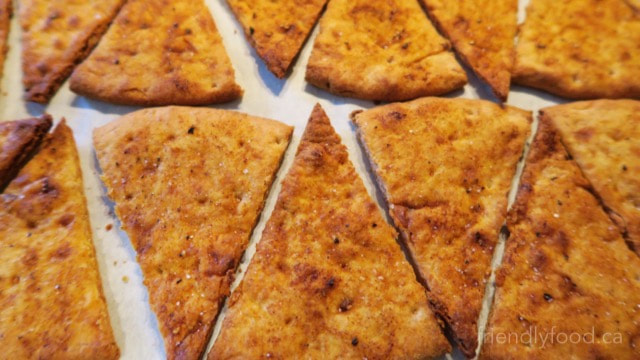 Prep & Cooking: 15 minutes Makes: 32 chips Pairs well with: Smoky White Bean Dip Main Ingredients: 4 pocketless whole wheat pitas 2 tbsp olive oil Juice of one lime or 2 tbsp lime juice 1 tsp chili powder ½ tsp garlic powder 1.5 tsps salt Pepper to taste Additional salt and lime juice to lightly sprinkle over chips before and after baking Method: Preheat oven to 350°F, and line two baking sheets with parchment paper or aluminium foil. Stack pitas 2 or more at a time, and using a large knife or pizza cutter, cut the rounds into 8 equal pieces (as shown in the photo below). Transfer pita triangles to the prepared baking sheets, being sure to arrange them flat with no overlapping. In a small bowl, mix together oil, chili powder, garlic powder, lime juice, salt, and pepper. Combine ingredients using a small whisk or fork until no lumps remain. Using a kitchen brush or spoon apply the mixture evenly over each triangle. Sprinkle coated chips with additional salt if desired and bake for 10-12 minutes, the edges will be golden and the spice mixture will be darkened and dry. Remove chips from the oven and while still warm, sprinkle lightly with additional lime juice if desired. Allow chips to cool for at least 5 minutes before removing them from the baking tray to enjoy. Store cooled chips for up to one week in a sealed container or bag. Tips & Variations:
Tangy and satisfying, this makes a great main dish, especially when accompanied by cool Summer salads! 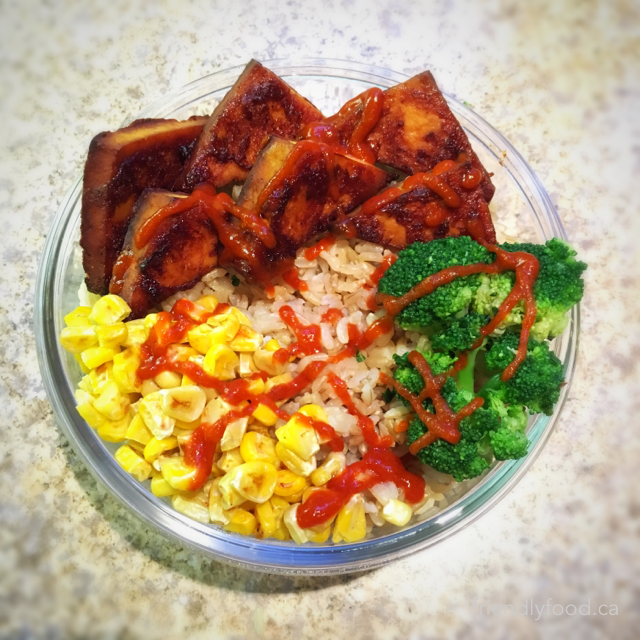 Prep & Cooking: 1- 1 ½ hours (depending on marinating time) Serves: 6-8 Pairs well with: Tangy Dill Potato Salad Main Ingredients: 1 block (450g) firm or extra firm tofu 1-1 ½ cup(s) of your favourite BBQ sauce Method: Drain water from the tofu package, remove tofu and gently squeeze the block applying enough pressure to release some liquid but not enough to crumble the tofu. You may want to do this over the sink in a colander. Wrap the tofu in paper or cloth towel and place on a plate large enough to catch any liquid that will drain. To speed the draining process, place a heavy object securely on top, I find a can of beans works well. This will allow excess water to drain before slicing the tofu and should be done for a minimum of 10 minutes. Preheat your oven to 400°F. If you are making your own BBQ sauce now is the time, if you are using a pre-made favourite find something enjoyable to do for about 10 minutes. Slice tofu into ½ inch slabs lengthwise, this will give you 4-5 slabs about the size of a large cell phone. Slice again, in half to create 2 squares from each slab, and slice again into triangles. In total you should have 16-20 triangles of tofu. Place sliced tofu pieces in a shallow bowl or container (a baking dish works well) and cover in bbq sauce, gently turning pieces to coat. At minimum, allow the tofu to marinate for 15 minutes, if you have time, allow the pieces to marinate for 30-60 minutes, if not, forge ahead. Line a baking sheet or shallow oven proof dish with parchment paper. Place tofu pieces on the sheet and with a brush or back of a spoon, top pieces with any remaining BBQ sauce. Bake for 20 minutes turning once at the 10 minute mark. Allow pieces to cool for a few minutes, top with additional sauce if desired. Tips & Variations:
A quick & tasty way to use sweet Summertime berries! 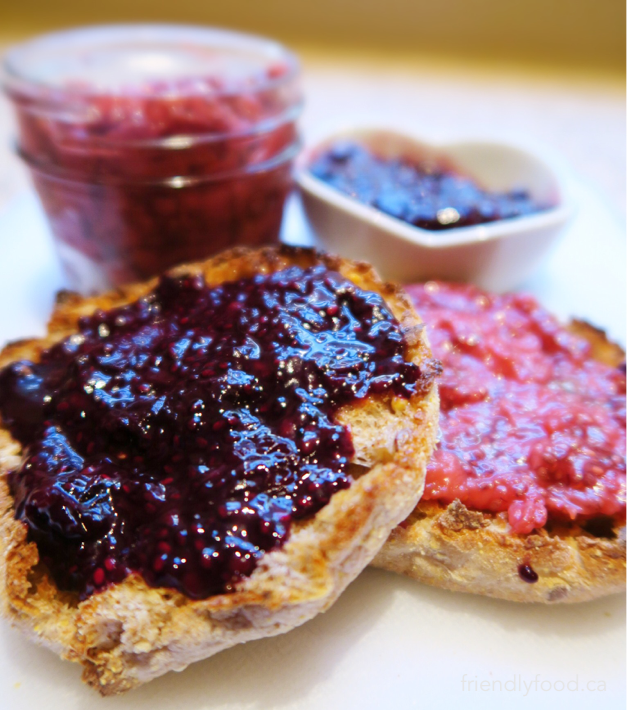 Prep & Cooking: 20 minutes + cooling time Makes: 1/2-3/4 cup Main Ingredients: 1 cup fresh or frozen berries – raspberries, blackberries and strawberries, or a combination *if you are using fresh strawberries cut into quarters or smaller, before heating *frozen berries often produce more liquid than fresh when heated, you may need to add a tablespoon of water or juice to fresh berries to create more liquid *see photos below for the results using different fruit, frozen mixed berries and fresh strawberries 1 tbsp chia seeds 1 tbsp liquid sweetener of your choice -maple syrup or agave nectar nectar work well Zest of 1/2 lemon or orange or about 1/2 tbsp Method: In a medium sized saucepan over medium-low heat, combine fruit and sweetener. Let simmer, stirring occasionally until fruit becomes soft, about 5-7 minutes. Using a small potato masher, back of a fork or wooden spoon, mash some, or all of the soft fruit depending on the desired texture of the finished jam. Add chia seeds and continue to simmer on low heat, stirring continuously until fruit mixture thickens, about 5-7 minutes. Remove hot jam mixture from heat and stir in citrus zest. Allow mixture to cool completely and transfer to a lidded glass jar. Tips & Variations:
A creamy and versatile version of a kitchen staple 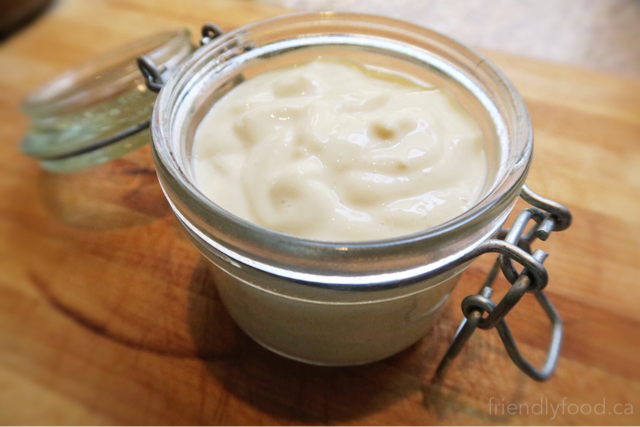 Prep: 5 minutes
Makes: 1 ¼ cups Pairs well with: Tangy Dill Potato Salad Main Ingredients: 12 oz. or 340 gr. soft tofu 2 tsp Dijon style mustard 1 ½ tsp salt 3 tsp lemon juice ½ -1 clove of garlic Method: Drain the liquid from the tofu using a sieve or colander. Soft tofu is delicate and you will not need to pat the tofu dry or squeeze the remaining liquid as mentioned in other tofu recipes. Using a blender, add all ingredients and blend until incorporated, approximately 1-2 minutes. Taste the mixture and add more mustard or salt if desired. This mayonnaise alternative can be kept for up to two weeks refrigerated in a sealed container. Tips & Variations:
No Campfire? No problem! A quick and simple solution for a popular Summertime treat! 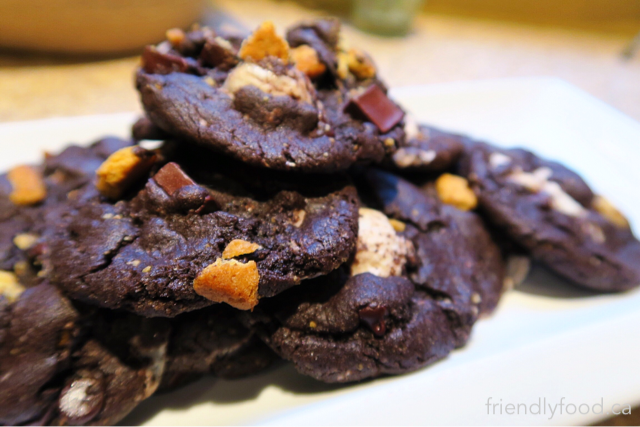 Prep & Cooking: 20 minutes Makes: 24 medium sized cookies Main Ingredients: 1 box of chocolate cake mix - substitute a gluten-free mix if needed ¾ cup mini or regular gelatine-free marshmallows – if using regular sized marshmallows cut each marshmallow into approximately 6 pieces 6 graham crackers or digestive biscuits broken into small pieces, roughly the size of the marshmallows ½ cups chocolate chips, chunks or pieces 1/3 cup vegetable oil ¼ cup water Method: Preheat oven to 350°F and line two baking sheets with parchment paper. In a large mixing bowl combine dry cake mix with oil and water. Stir together until all ingredients are incorporated and there are no lumps. Add in marshmallows, cookies pieces and chocolate chips. Mix well to evenly distribute the added ingredients, there may be some breakage of the cookie pieces and that’s ok – the more rustic looking, the better! The dough should be firm and easy to roll into balls. If you find the dough sticky, refrigerate for 20-30 minutes. You may have some stray cookie and chocolate pieces at the bottom of your bowl that didn’t quite mix into the batter, just push the extra pieces into the top of the cookie balls before baking. Roll dough into 1-1.5 inch balls and place on prepared cookie sheet. These cookies will spread and I recommend putting no more than 8 cookie balls on each sheet. Bake the cookies for 10-12 minutes, transfer to a rack or plate to cool for around 10 minutes. The marshmallow in particular will be very hot and gooey, it’s delicious, but be careful! Tips & Variations:
|

Archives
December 2020
Categories
All
|