|
A savoury topping for pasta, potatoes, & salad! 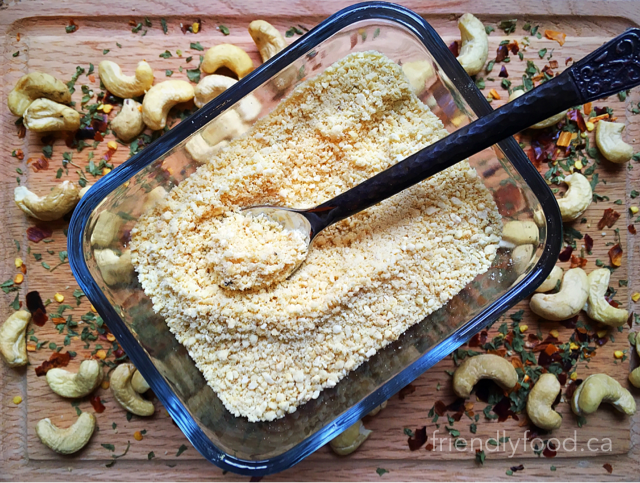 Prep Time: 10 minutes Makes: 1 cup Main Ingredients: 1 cup raw cashews Salt to taste – if the cashews are already salted omit the additional salt 2-3 tbsp nutritional yeast 1 tbsp granulated garlic Method: In a food processor or blender, combine all ingredients and blend until the texture is sandy and no cashew lumps remain. Store in an airtight container in the refrigerator for several months. Use to top pasta, salads, and potatoes. Tips & Variations: • Add red pepper flakes into the blender process for a spicy version!
0 Comments
Garden favourites made even better when brought together in this crunchy, refreshing side!  Prep & Cooking: 20 minutes plus additional time in the refrigerator Serves: 4-6 Pairs well with: Oil-Free "Mayo" Main Ingredients: 1 cucumber thinly sliced 5-10 radishes (depending on size and preference) also thinly sliced *a mandolin is not necessary and a sharp knife will do just fine, whatever you choose to use – be careful! 2 tbsp of fresh dill, chopped 1 small red onion, chopped Dressing: 1/3-1/2 cup Oil-Free Mayo or your favourite store bough plant-based mayonnaise *if using Friendly Food’s Oil-Free "Mayo" recipe, the following ingredients are in addition to those already incorporated in the original recipe 1 clove of garlic, minced 1-2 tsp Dijon style mustard ½ - 1 tsp salt ½ - 1 tsp pepper 2 tbsp lemon juice Method: In a large bowl, combine dressing ingredients and whisk together. Thin the dressing as needed with additional lemon juice. Add the sliced cucumber, radish, dill, and red onion and toss to coat. Transfer the salad to a bowl for serving, if desired, and top with additional ground pepper and dill. Keep the salad refrigerated until ready to serve. This salad is best served cold and has an enhanced flavour if allowed to sit for a few hours before enjoying. Fresh and light, this dip makes a delicious sunny day snack 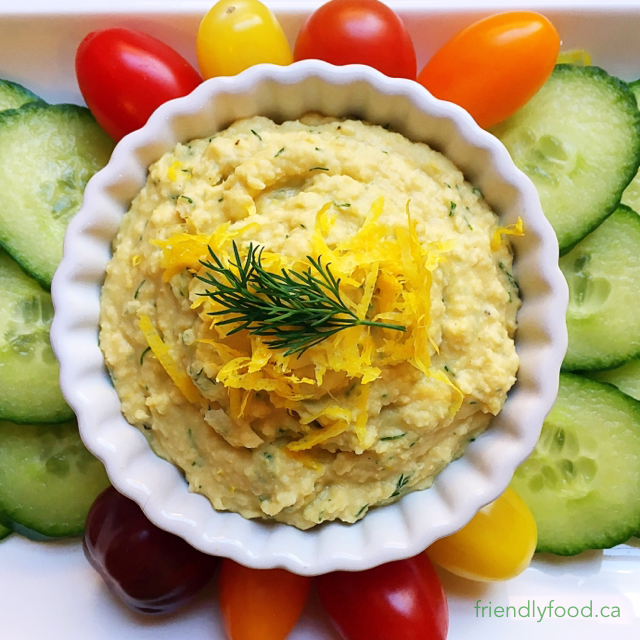 Prep & Cooking: 20 minutes (add additional cooking time if you are using dried beans) Makes: 1 ½ cups Pairs well with: Chili Lime Pita Chips Main Ingredients: 1 jar or can (400ml/15 oz.) chickpeas, drained and rinsed 2-3 cloves garlic ¼ cup olive oil Juice and zest of half a lemon 2-3 tbsp tahini (optional) 1 ½ tsp salt 1 tsp (or more) freshly ground black pepper ½ tsp cumin 3-4 tbsp chopped fresh dill Optional Garnish: Lemon zest, fresh dill sprigs and/or additional freshly ground black pepper Method: In a food processor or blender, combine chickpeas, garlic, oil, lemon juice, and tahini. Blend until smooth. Add the lemon zest, salt, pepper, cumin, and dill and continue to blend until all spices and herbs are incorporated. Remove from processor and transfer to a small bowl or storage container. Garnish with additional lemon zest, dill, and/or cracked black pepper. Serve with cut vegetable, crackers or toast. This hummus will keep in the refrigerator in a sealed container for up to 1 week. A bounty of colour & flavour combined! 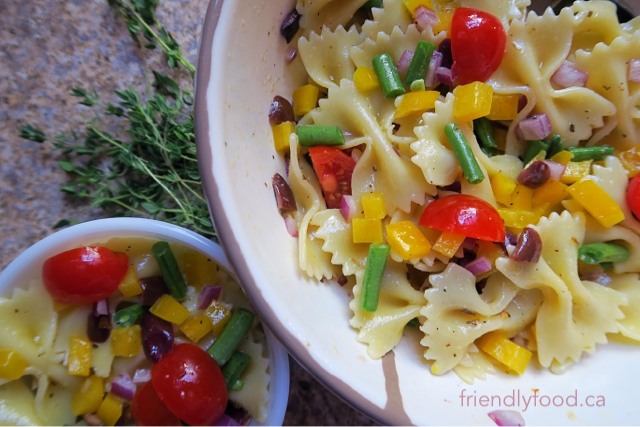 Prep & Cook time: 15 mins Serves: 6-8 Pairs well with: Zesty Herb Dressing Main Ingredients: 1lb dry pasta of your choice – shaped pasta such as bowtie or rigatoni make for a nice presentation and tend to hold the dressing well ½ - ¾ cup of Friendly Food’s zesty herb dressing – if you are short on time or ingredients your favourite pre-made Italian dressing will do the trick ½ bell pepper, chopped ½ cup green beans, raw and chopped ½ cup red onion, chopped ½ cup grape tomatoes, quartered 10 or more olives, pitted and chopped – we chose kalamata, but use what you like and have on hand Method: Cook your chosen pasta until al dente, often the package will indicate a range of 8-12 minutes. While the pasta is cooking, wash and chop your vegetables. Keeping your cut vegetables small and around the same size makes the finished salad easier to eat. Drain your pasta and allow to cool for just a few minutes. Dressing the pasta while it is still a little warm enhances the flavour; bringing the herbs and seasonings to life and helps to ensure the pasta is well coated. Toss the cooked pasta in the dressing to coat and add the chopped vegetables. Give the salad an additional few stirs to blend the vegetables evenly throughout the pasta. Add additional salt, pepper, and chopped fresh herbs if desired. Serve immediately or allow the flavours to intensify by refrigerating for a few hours. The salad will keep for several days in a sealed container in the refrigerator. Tips & Variations:
Tangy and a little bit sweet – a perfect salad topper 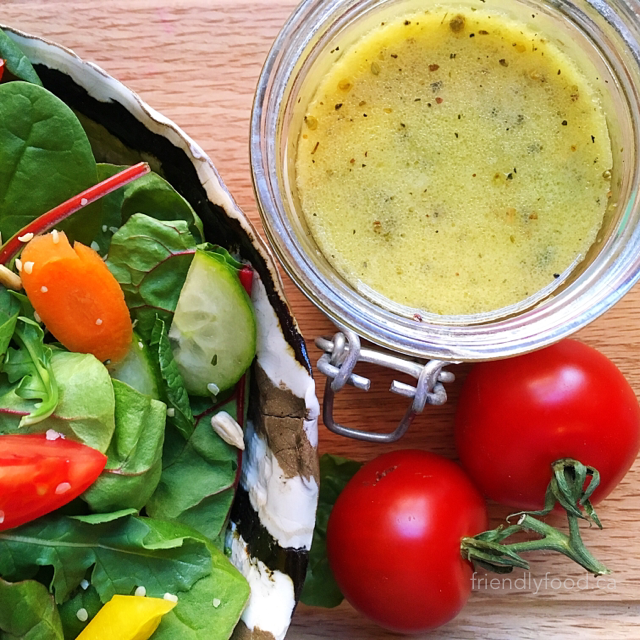 Prep & Cooking: 5 minutes Makes: 1 cup Main Ingredients: ¾ cup olive oil ¼ cup white wine vinegar 1 clove fresh garlic, grated 1 tsp dried oregano 1tsp dried basil 1 tsp dried thyme 1 tsp onion powder 1 tsp red pepper flakes 1 tsp agave syrup or sugar 2 tbsp lemon juice 2 tbsp Dijon mustard 1 tbsp nutritional yeast (optional) Salt and pepper to taste Method: In a small bowl, whisk together oil, vinegar, mustard, lemon juice, agave, and garlic. When ingredients are combined, add the herbs, seasonings, and nutritional yeast. Stir to combine. Store in an airtight jar in the refrigerator and shake before using. Use right away, allow the dressing to sit for a few hours, or overnight in the refrigerator for a more intense flavour. Tips & Variations:
A bright and light addition to your spring or summer picnic platter! 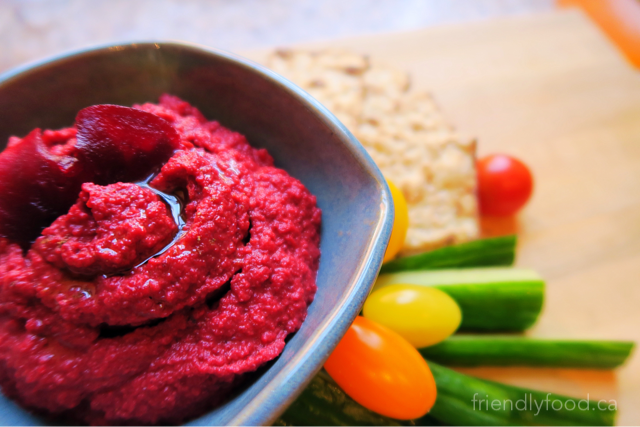 Prep & Cooking: 20 minutes (add additional cooking time if you are roasting the beets yourself) Makes: 2 cups Pairs well with: Chili Lime Pita Chips Main Ingredients: 1 jar or can (400ml/15 oz.) chickpeas, drained and rinsed 2-3 cloves garlic ¼ cup olive oil 2-3 tbsp lemon juice 2-3 tbsp tahini (optional) 1 ½ tsp salt 1 tsp freshly ground black pepper 1-2 tsp cumin 4-5 medium beets (approximately 1 ½ cups), peeled, roasted and sliced (not pickled) Optional Garnish: Thinly sliced beets, freshly ground black pepper, and/or a drizzle of olive oil Method: In a food processor or blender, combine chickpeas, garlic, oil, lemon juice, and tahini. Blend until smooth. Add the salt, pepper, cumin, and sliced beetroot and continue to blend until all ingredients are incorporated. Avoid adding too much liquid with the beets initially. If you want to thin the hummus or make the colour really ‘pop’ add beet juice a few tablespoons at a time. Remove from processor and transfer to a small bowl or storage container. Garnish with additional sliced beets, cracked black pepper, and/or a drizzle of olive oil. Serve with cut vegetable, crackers, or toast. This hummus will keep in the refrigerator in a sealed container for up to 1 week. A spicy & satisfying simple supper!  Prep & Cooking Time: 45 minutes Serves: 4-6 Main Ingredients: 1 package of firm or extra firm tofu - usually packages are anywhere between 325-450 grams ¼ cup peanut butter 3 tbsp tamari or soy sauce 1 tbsp rice vinegar 2 tbsp sriracha sauce Juice of one lime or 2 tbsp of lime juice 1 clove of garlic crushed or 1 tsp minced 1/3 cup chopped salted and roasted peanuts (optional garnish) ¼ cup chopped green onions and/or chili peppers (optional garnish) Method: Drain water from the tofu package, remove tofu and gently squeeze the block applying enough pressure to release some liquid but not enough to crumble the tofu. You may want to do this over the sink in a colander. Wrap the tofu in paper or cloth towel and place on a plate large enough to catch any liquid that will drain. To speed the draining process, place a heavy object securely on top, I find a can of beans works well. This will allow excess water to drain before slicing the tofu and should be done for a minimum of 10 minutes. In a small bowl combine peanut butter, tamari, vinegar, sriracha, lime juice and garlic. Whisk together until the mixture forms a thick sauce and there are no lumps of peanut butter. Set sauce aside and unwrap the tofu. Slice tofu into thin strips, approximately ¼ inch thick or small cubes (as pictured). In a dry pan over medium-low heat, brown tofu for 3-4 minutes per side (2 sides). When tofu is browned, remove from heat and add sauce mixture, tossing to coat. If the sauce appears too thin, return coated tofu to low heat for 1-2 minutes stirring frequently until the sauce reaches desired consistency. Top with chopped peanuts, chili, and green onion, serve over rice or noodles or with a side of greens. Tips & Variations:
A quick, simple, and flavourful way to dress up your salad! 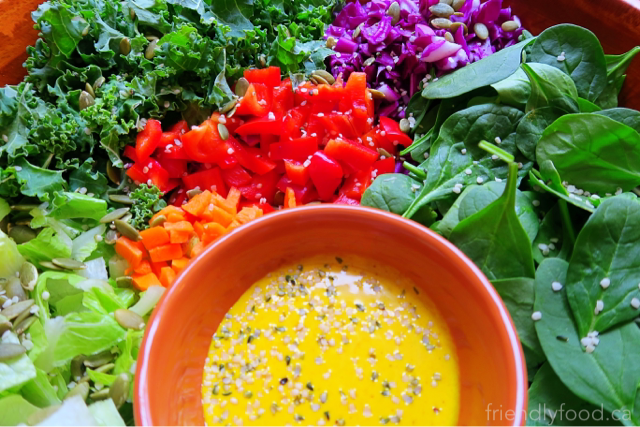 Prep & Cooking: 5 minutes Serves: 1-2 Main Ingredients: 2 tbsp tahni (sesame seed butter) 1 tbsp maple syrup 1 tbsp apple cider vinegar 1 tbsp lemon juice 1 tsp turmeric Pinch of cayenne (optional) Pinch of salt (optional) 2-3 tsp water (use, if necessary, to thin out the dressing - depending on desired consistency) Method: In a small bowl, mix together the tahini, lemon juice, vinegar, and maple syrup. When blended and smooth, add turmeric, salt, and cayenne and stir to combine. If you would like a thinner consistency, add water a teaspoon at a time and continue to whisk together. Tips & Variations:
A make-ahead appetizer to cut cook and prep time on dinner day! 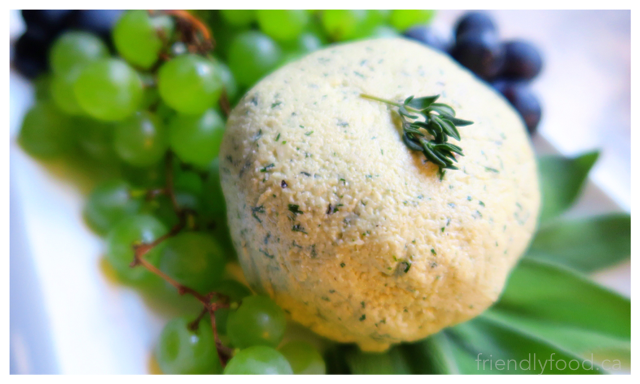 Prep & Cooking: Soaking cashews for 4-24 hours and 10-20 minutes to combine ingredients and process Serves: 6-8 as an appetizer Pairs well with: Fall Menu Plan Main Ingredients: 1 cup raw cashews – you can use whole or pieces, whole cashews are easier to work with if soaked longer 2 cloves or 2-3 tsp crushed garlic 2 tbsp fresh sage 2 tbsp fresh thyme 3-4 tbsp fresh dill 1 tsp salt 1 tsp ground pepper Juice of half a lemon 2 tsp nutritional yeast (optional) Method: In a lidded container, soak 1 cup of raw cashews in water for a minimum of 4 hours, to a maximum of 24 hours. The longer you soak the cashews, the easier the nuts are to process and blend. If you will be using an older or low-power blender or food processor soak the nuts as long as possible. Drain the water and transfer the nuts to a blender or food processor. Add garlic, herbs, lemon juice, nutritional yeast, salt & pepper. Blend all ingredients until smooth. This will take awhile, up to 10-20 minutes depending on the power of your machine. You will need to stop the blender or processor several times to scrap the sides. Once you have reached a smooth consistency, transfer the nut cheese mixture to a lidded container and keep in the refrigerator until ready to eat. Serve with crackers, toast or flatbread and enjoy! Tips & Variations:
A rich and savoury compliment to your holiday menu 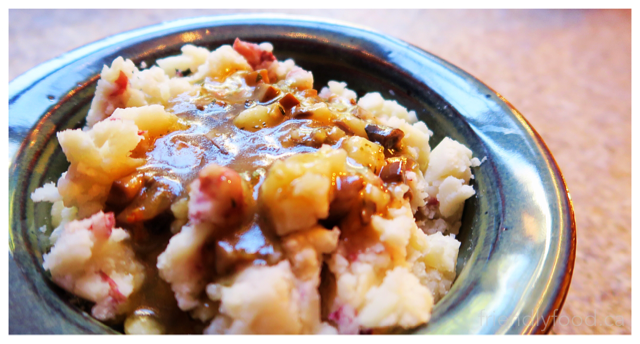 Prep & Cooking: 10 minutes Serves: 6-8 Pairs well with: Fall Menu Plan Main Ingredients: 3 tbsp plant-based butter or olive oil 2 cloves garlic, minced 1/8 cup finely chopped onion 1 cup cremini mushrooms, chopped 2 tbsp corn starch or flour 2 cups vegetable broth or use stock cubes, just follow the instructions to create 2 cups of stock 1 tbsp tamari or soy sauce (optional) Seasonings: 1 tsp fresh thyme or ½ tsp dried thyme 1 tsp fresh sage or ½ tsp dried sage 1 tsp fresh rosemary or ½ tsp dried rosemary – chop the rosemary leaves into small pieces to avoid a “chewy” gravy salt & pepper to taste Method: In a medium saucepan over medium heat, melt plant-based butter. Reduce heat to low and add garlic and onion; sautéing for a few minutes until the onion is soft. Be sure to watch the heat and reduce if the garlic is starting to brown. Add chopped mushrooms and continue to sauté over low heat, allowing the mushrooms some time to cook. Stir occasionally to avoid burning or sticking. While the mushrooms are cooking, combine the corn starch with 2-3 tablespoons of broth and whisk together. If you skip this step and add the corn starch directly to the gravy at the end, the corn starch will stay lumpy and your gravy won’t be smooth. Set the corn starch and broth mixture aside and add remaining stock to the saucepan. Use a wooden spoon to scrap the bottom of the pan and remove any bits that may have stuck to the bottom; the broth will help loosen them. Add the corn starch and broth mixture slowly, and whisk to incorporate. After the all ingredients are combined, turn the heat up to medium and bring the gravy to a boil; allow the mixture to gently boil for 1-2 minutes and reduce heat to low. The gravy will start to thicken. Continue to stir to avoid burning and whisk again if needed. After gravy has thickened, add salt and pepper and give it a taste. If you would like to add the tamari or soy sauce for an additional richness, add that now. This gravy keeps well in a lidded container, in the refrigerator for up to a week. Tips & Variations:
|

Archives
December 2020
Categories
All
|